检查点
Create a cloud data fusion instance
/ 25
Add Cloud Data Fusion API Service Agent role to service account
/ 25
Deploy a sample pipeline
/ 25
View the result
/ 25
Getting Started with Cloud Data Fusion

Overview
This lab teaches you how to create a Data Fusion instance and deploy a sample pipeline that's provided. The pipeline reads a JSON file containing NYT bestseller data from Cloud Storage. The pipeline then runs transformations on the file to parse and clean the data. And finally loads a subset of the records into BigQuery.
Objectives
In this lab you will learn to:
- Create a Data Fusion instance
- Deploy a sample pipeline that runs some transformations on a JSON file and filter out matching results into BigQuery
Setup
For each lab, you get a new Google Cloud project and set of resources for a fixed time at no cost.
-
Sign in to Qwiklabs using an incognito window.
-
Note the lab's access time (for example,
1:15:00), and make sure you can finish within that time.
There is no pause feature. You can restart if needed, but you have to start at the beginning. -
When ready, click Start lab.
-
Note your lab credentials (Username and Password). You will use them to sign in to the Google Cloud Console.
-
Click Open Google Console.
-
Click Use another account and copy/paste credentials for this lab into the prompts.
If you use other credentials, you'll receive errors or incur charges. -
Accept the terms and skip the recovery resource page.
Log in to Google Cloud Console
- Using the browser tab or window you are using for this lab session, copy the Username from the Connection Details panel and click the Open Google Console button.
- Paste in the Username, and then the Password as prompted.
- Click Next.
- Accept the terms and conditions.
Since this is a temporary account, which will last only as long as this lab:
- Do not add recovery options
- Do not sign up for free trials
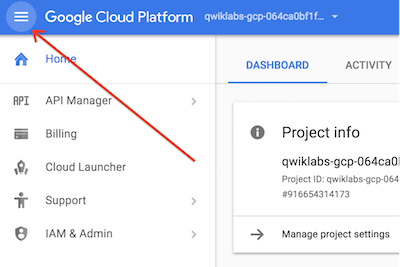
- Once the console opens, view the list of services by clicking the Navigation menu (
) at the top-left.
Activate Cloud Shell
Cloud Shell is a virtual machine that contains development tools. It offers a persistent 5-GB home directory and runs on Google Cloud. Cloud Shell provides command-line access to your Google Cloud resources. gcloud is the command-line tool for Google Cloud. It comes pre-installed on Cloud Shell and supports tab completion.
-
Click the Activate Cloud Shell button (
) at the top right of the console.
-
Click Continue.
It takes a few moments to provision and connect to the environment. When you are connected, you are also authenticated, and the project is set to your PROJECT_ID.
Sample commands
- List the active account name:
(Output)
(Example output)
- List the project ID:
(Output)
(Example output)
Check project permissions
Before you begin working on Google Cloud, you must ensure that your project has the correct permissions within Identity and Access Management (IAM).
-
In the Google Cloud console, on the Navigation menu (
-
Confirm that the default compute Service Account
{project-number}-compute@developer.gserviceaccount.comis present and has theeditorrole assigned. The account prefix is the project number, which you can find on Navigation menu > Cloud overview.
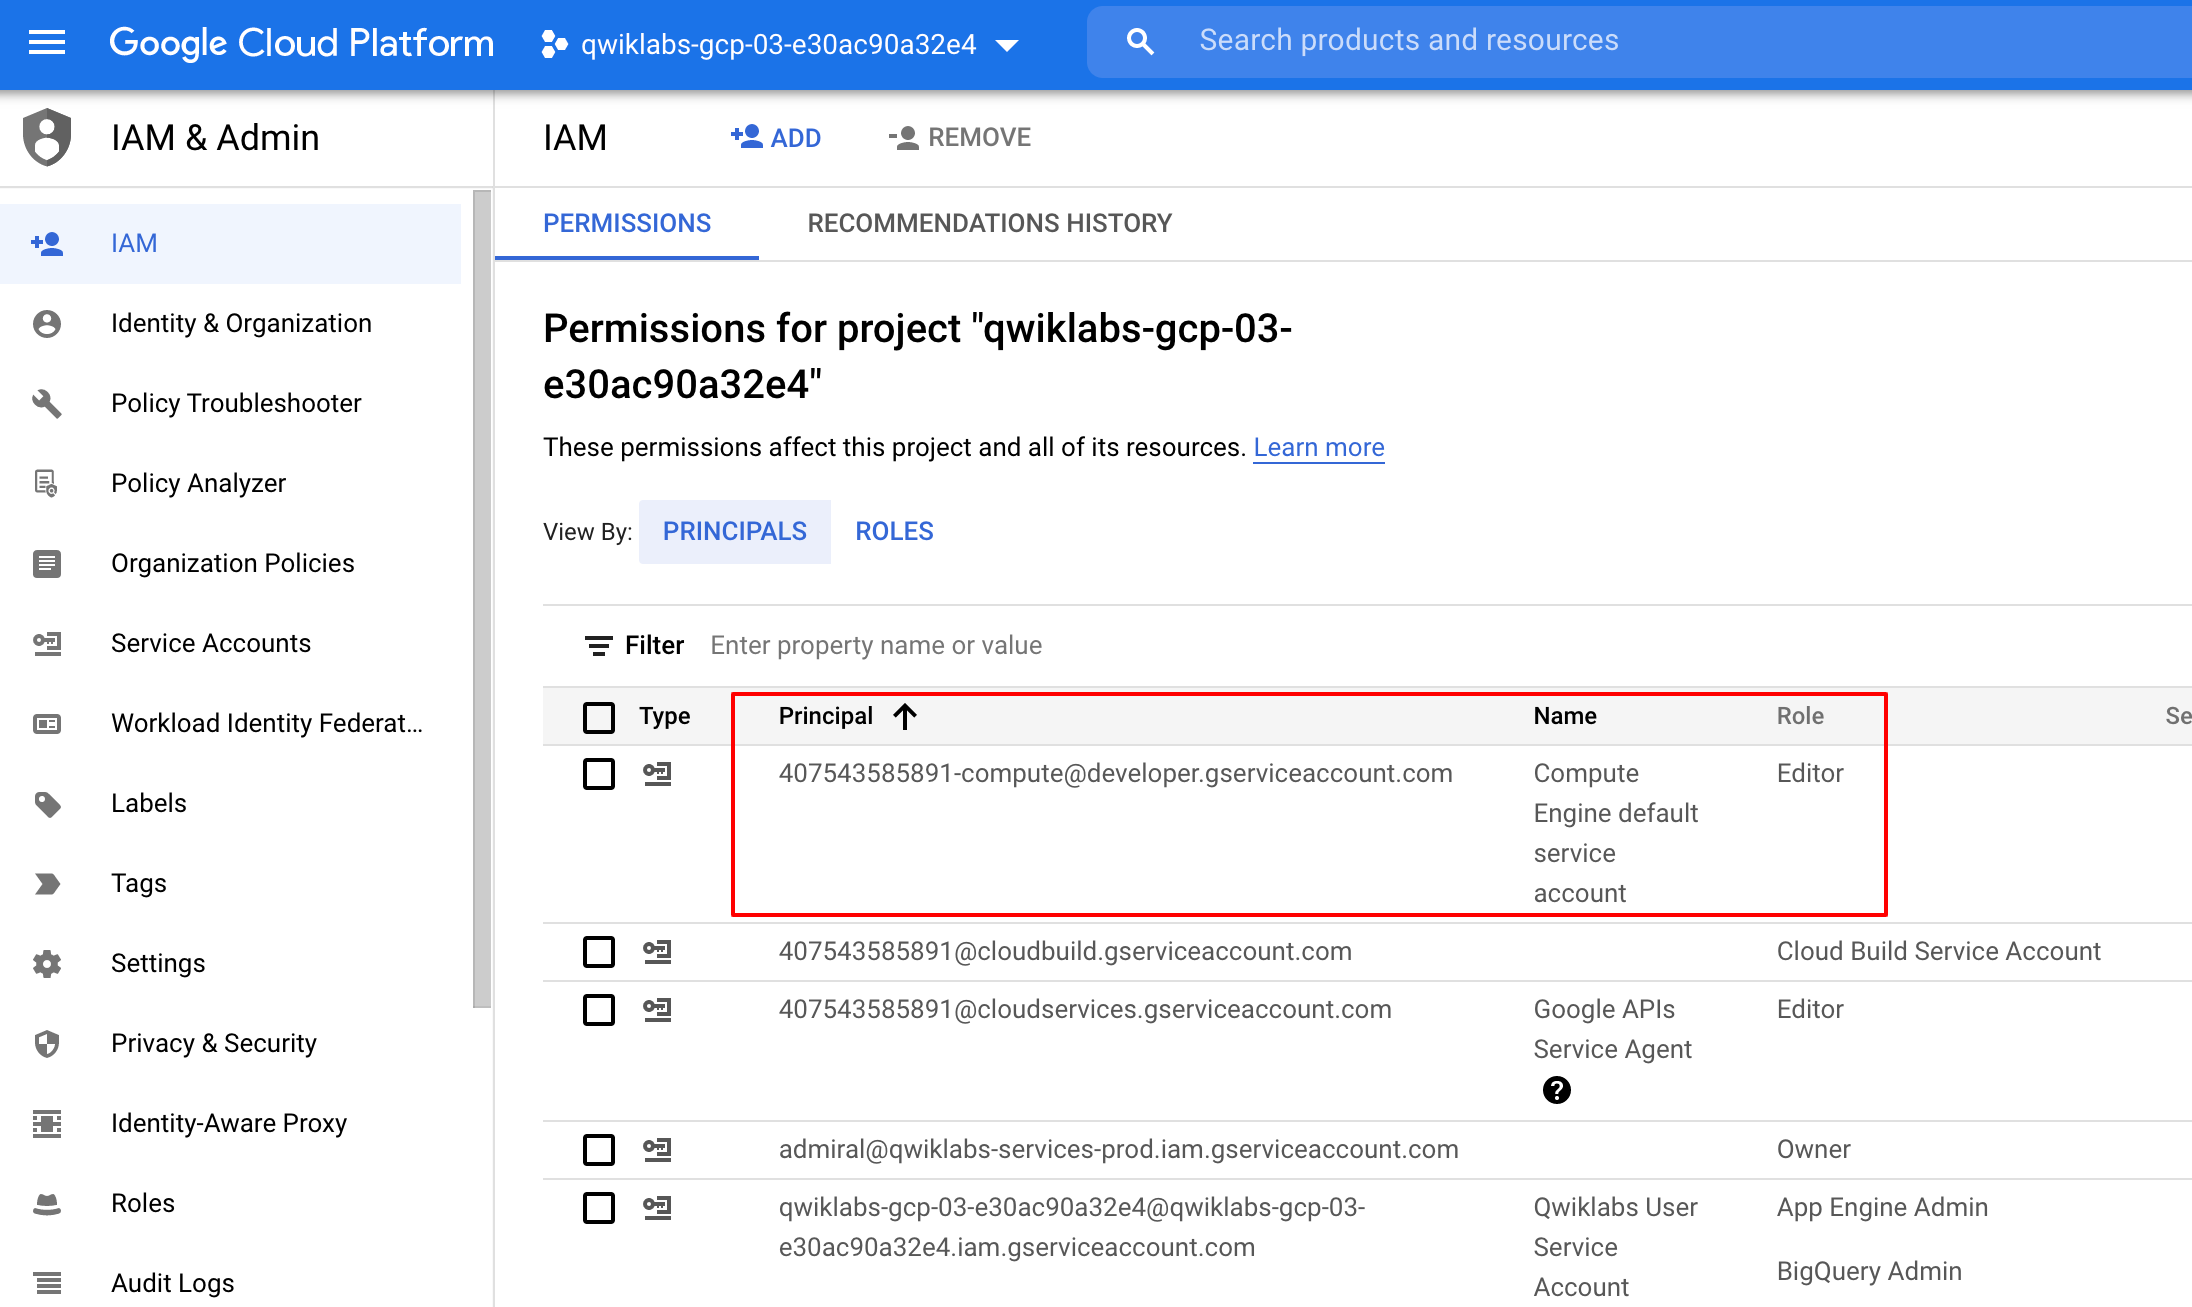
If the account is not present in IAM or does not have the editor role, follow the steps below to assign the required role.
-
In the Google Cloud console, on the Navigation menu, click Cloud overview.
-
From the Project info card, copy the Project number.
-
On the Navigation menu, click IAM & Admin > IAM.
-
At the top of the IAM page, click Add.
-
For New principals, type:
Replace {project-number} with your project number.
-
For Select a role, select Basic (or Project) > Editor.
-
Click Save.
Task 1. Enable Cloud Data Fusion API
-
In the Cloud console, from the Navigation menu, select APIs & Services > Library.
-
In the search box, type fusion to find the Cloud Data Fusion API and click on the hyperlink.
-
Click Enable if necessary.
Task 2. Create a Cloud Data Fusion instance
-
In the Cloud console, from the Navigation menu select Data Fusion.
-
Click the Create an Instance link at the top of the section to create a Cloud Data Fusion instance.
-
In the Create Data Fusion instance page that loads:
a. Enter a name for your instance (like cdf-lab-instance). For region select us-central1.
b. Under Edition, select Basic
c. Click Grant Permission if required.
d. Click on the dropdown icon next to Advanced Options, under Logging and monitoring, check the checkbox for Enable Stackdriver logging service
e. Leave all other fields as-is, then click Create.
Click Check my progress to verify the objective.
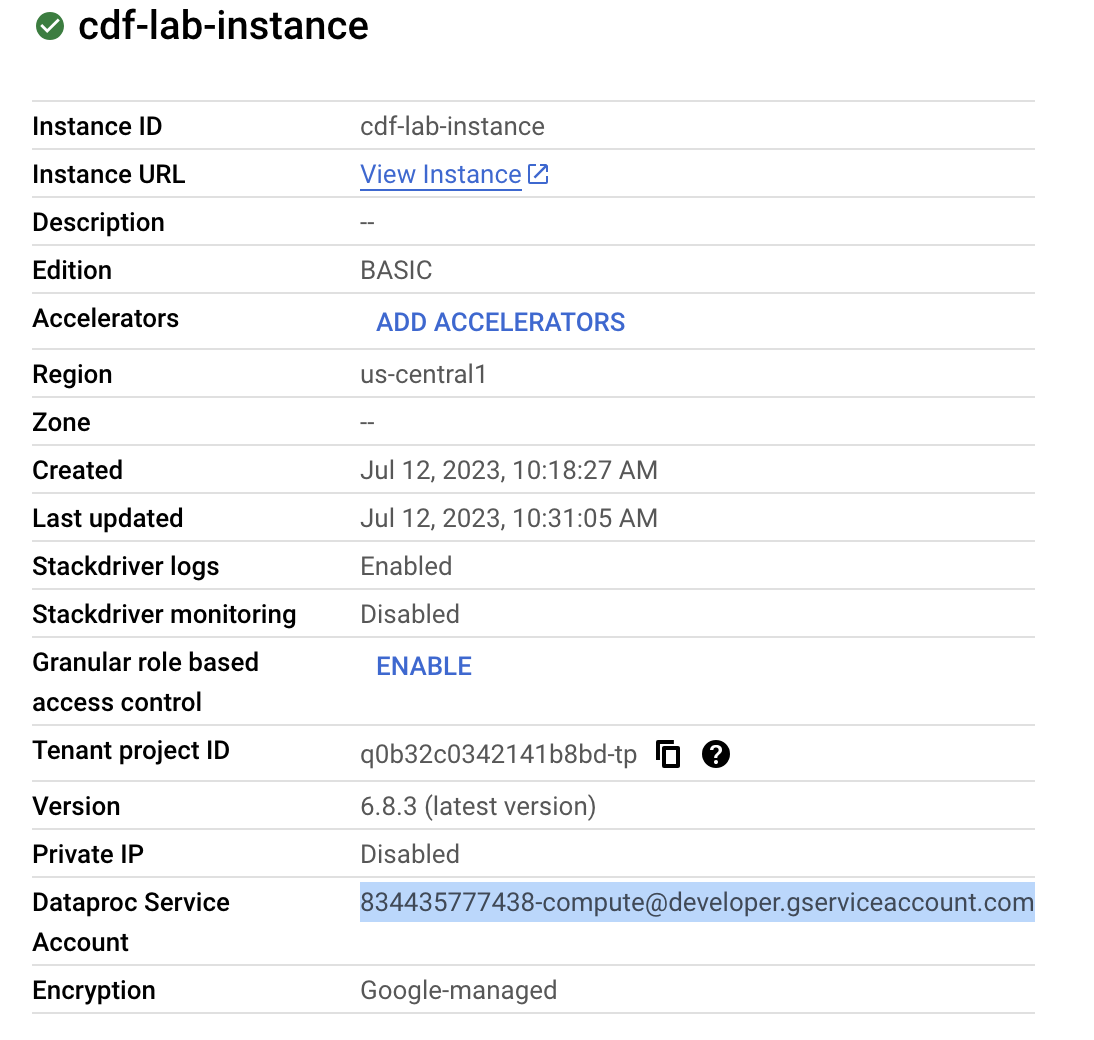
Next, you will grant permissions to the service account associated with the instance, using the following steps.
- Click on the instance name. On the Instance details page copy the Dataproc Service Account to your clipboard.
-
In the Cloud console navigate to the IAM & Admin > IAM.
-
On the IAM Permissions page, click +Grant Access.
-
In the New principals field paste the service account.
-
Click into the Select a role field and start typing Cloud Data Fusion API Service Agent, then select it.
-
Click Save.
Click Check my progress to verify the objective.
Task 3. Navigate the Cloud Data Fusion UI
When using Cloud Data Fusion, you use both the Cloud console and the separate Cloud Data Fusion UI.
-
In the Cloud console, you can create and delete Cloud Data Fusion instances, and view Cloud Data Fusion instance details.
-
In the Cloud Data Fusion web UI, you can use the various pages, such as Pipeline Studio or Wrangler, to use Cloud Data Fusion functionality.
To navigate the Cloud Data Fusion UI, follow these steps:
-
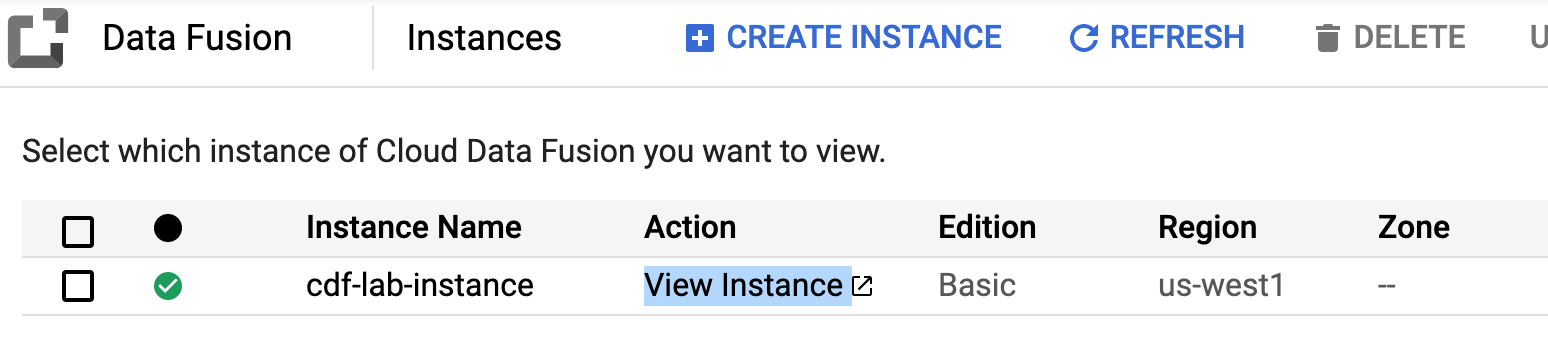
In the Cloud console return to Navigation menu > Data Fusion.
-
Click the View Instance link next to your Data Fusion instance. Select your lab credentials to sign in, if required.
-
If prompted to take a tour of the service click on No, Thanks. You should now be in the Cloud Data Fusion UI.
-
Notice that the Cloud Data Fusion web UI comes with its own navigation panel (on the left) to navigate to the page you need.
Task 4. Deploy a sample pipeline
Sample pipelines are available through the Cloud Data Fusion Hub, which allows you to share reusable Cloud Data Fusion pipelines, plugins, and solutions.
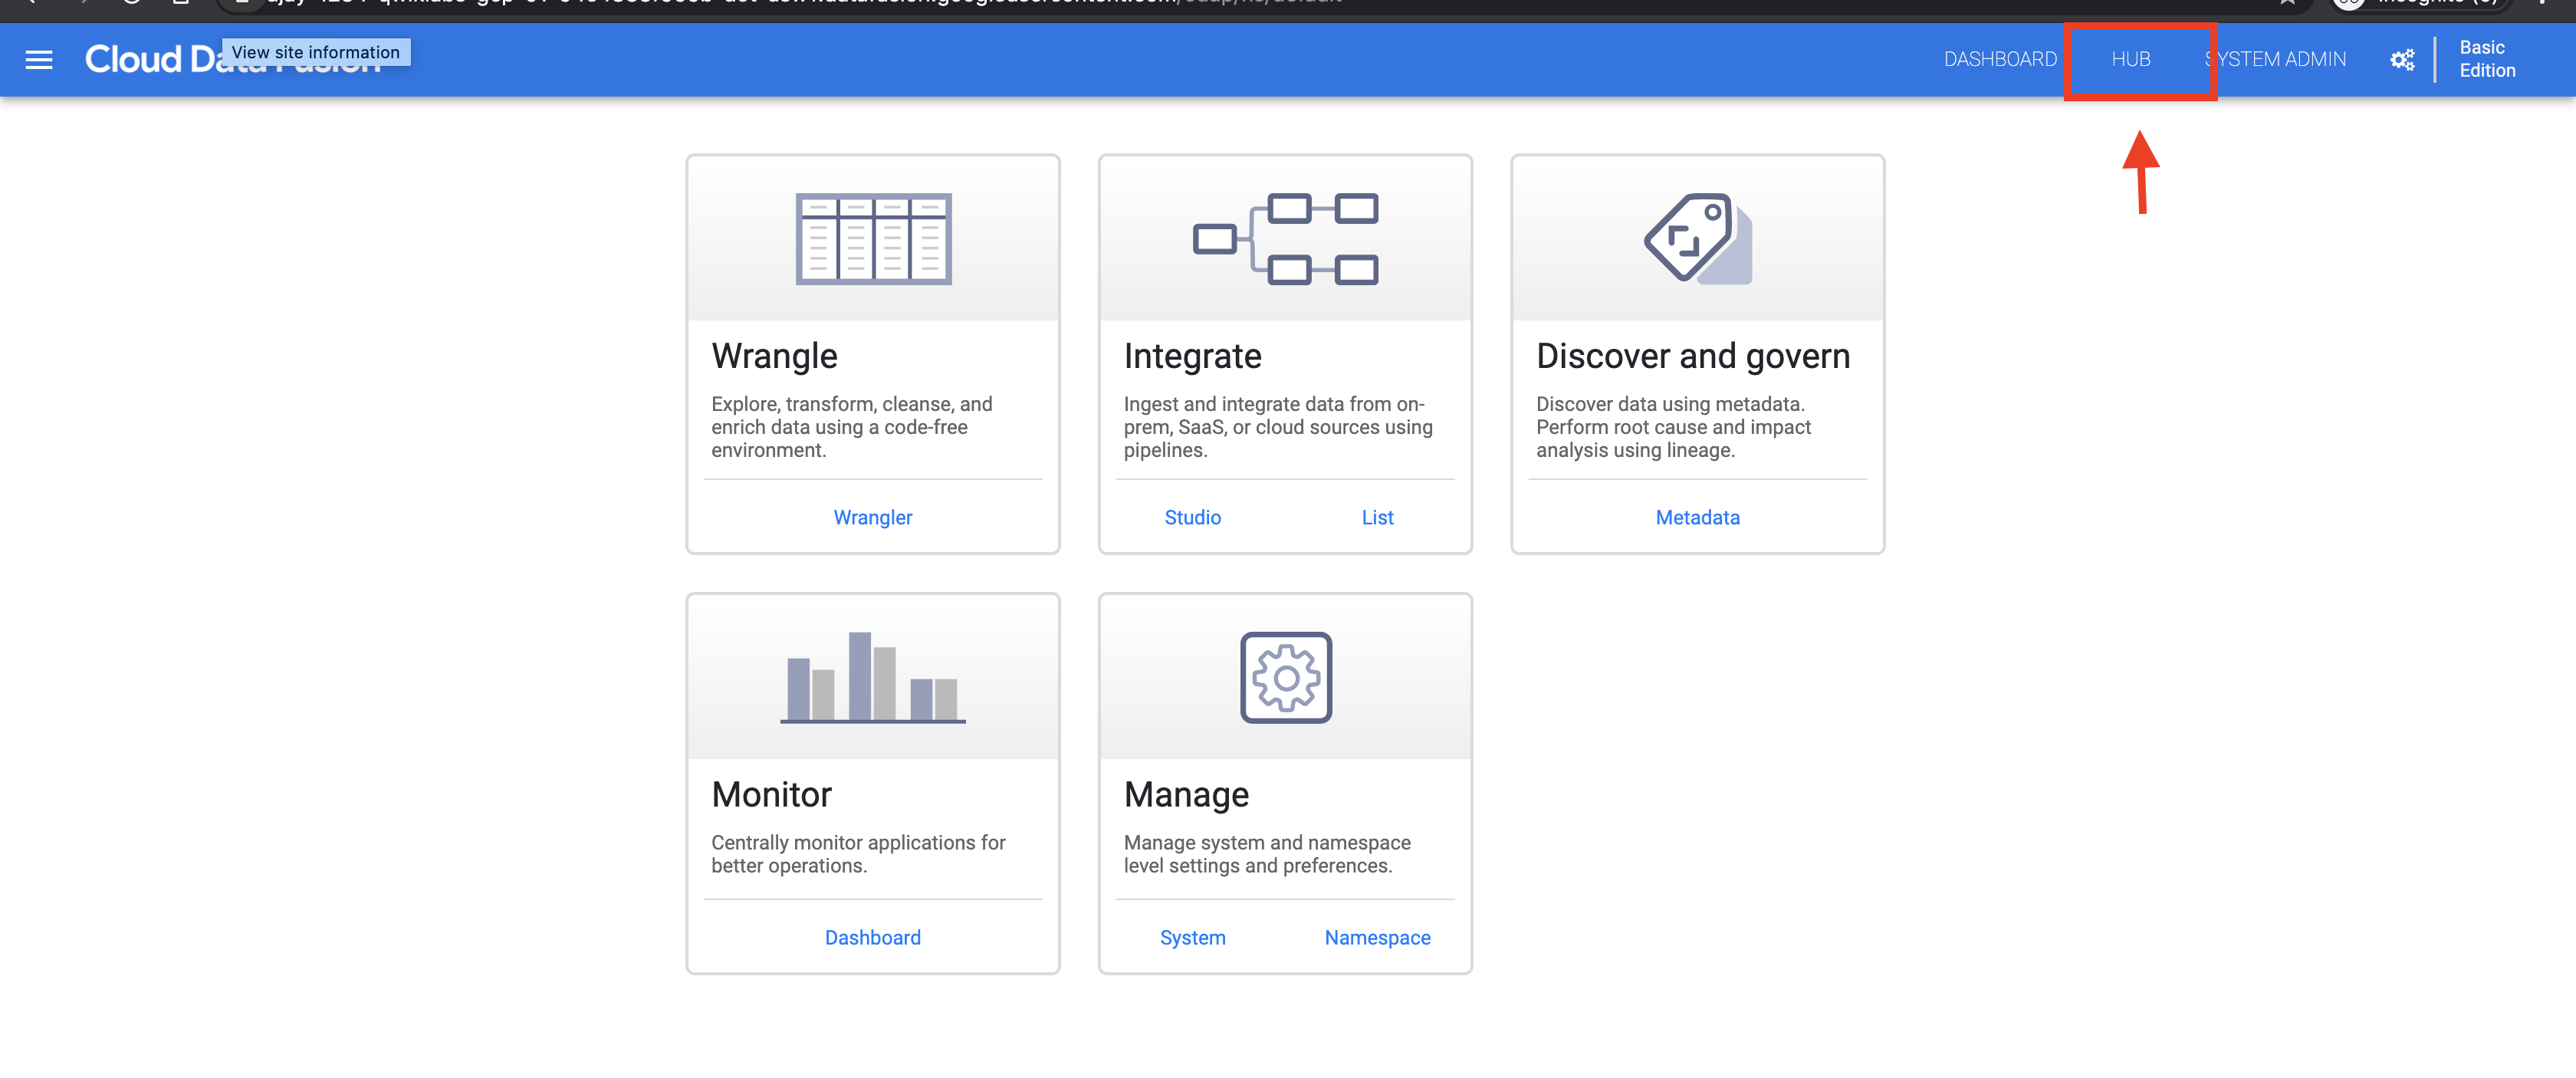
- In the Cloud Data Fusion web UI, click HUB on the top right.
-
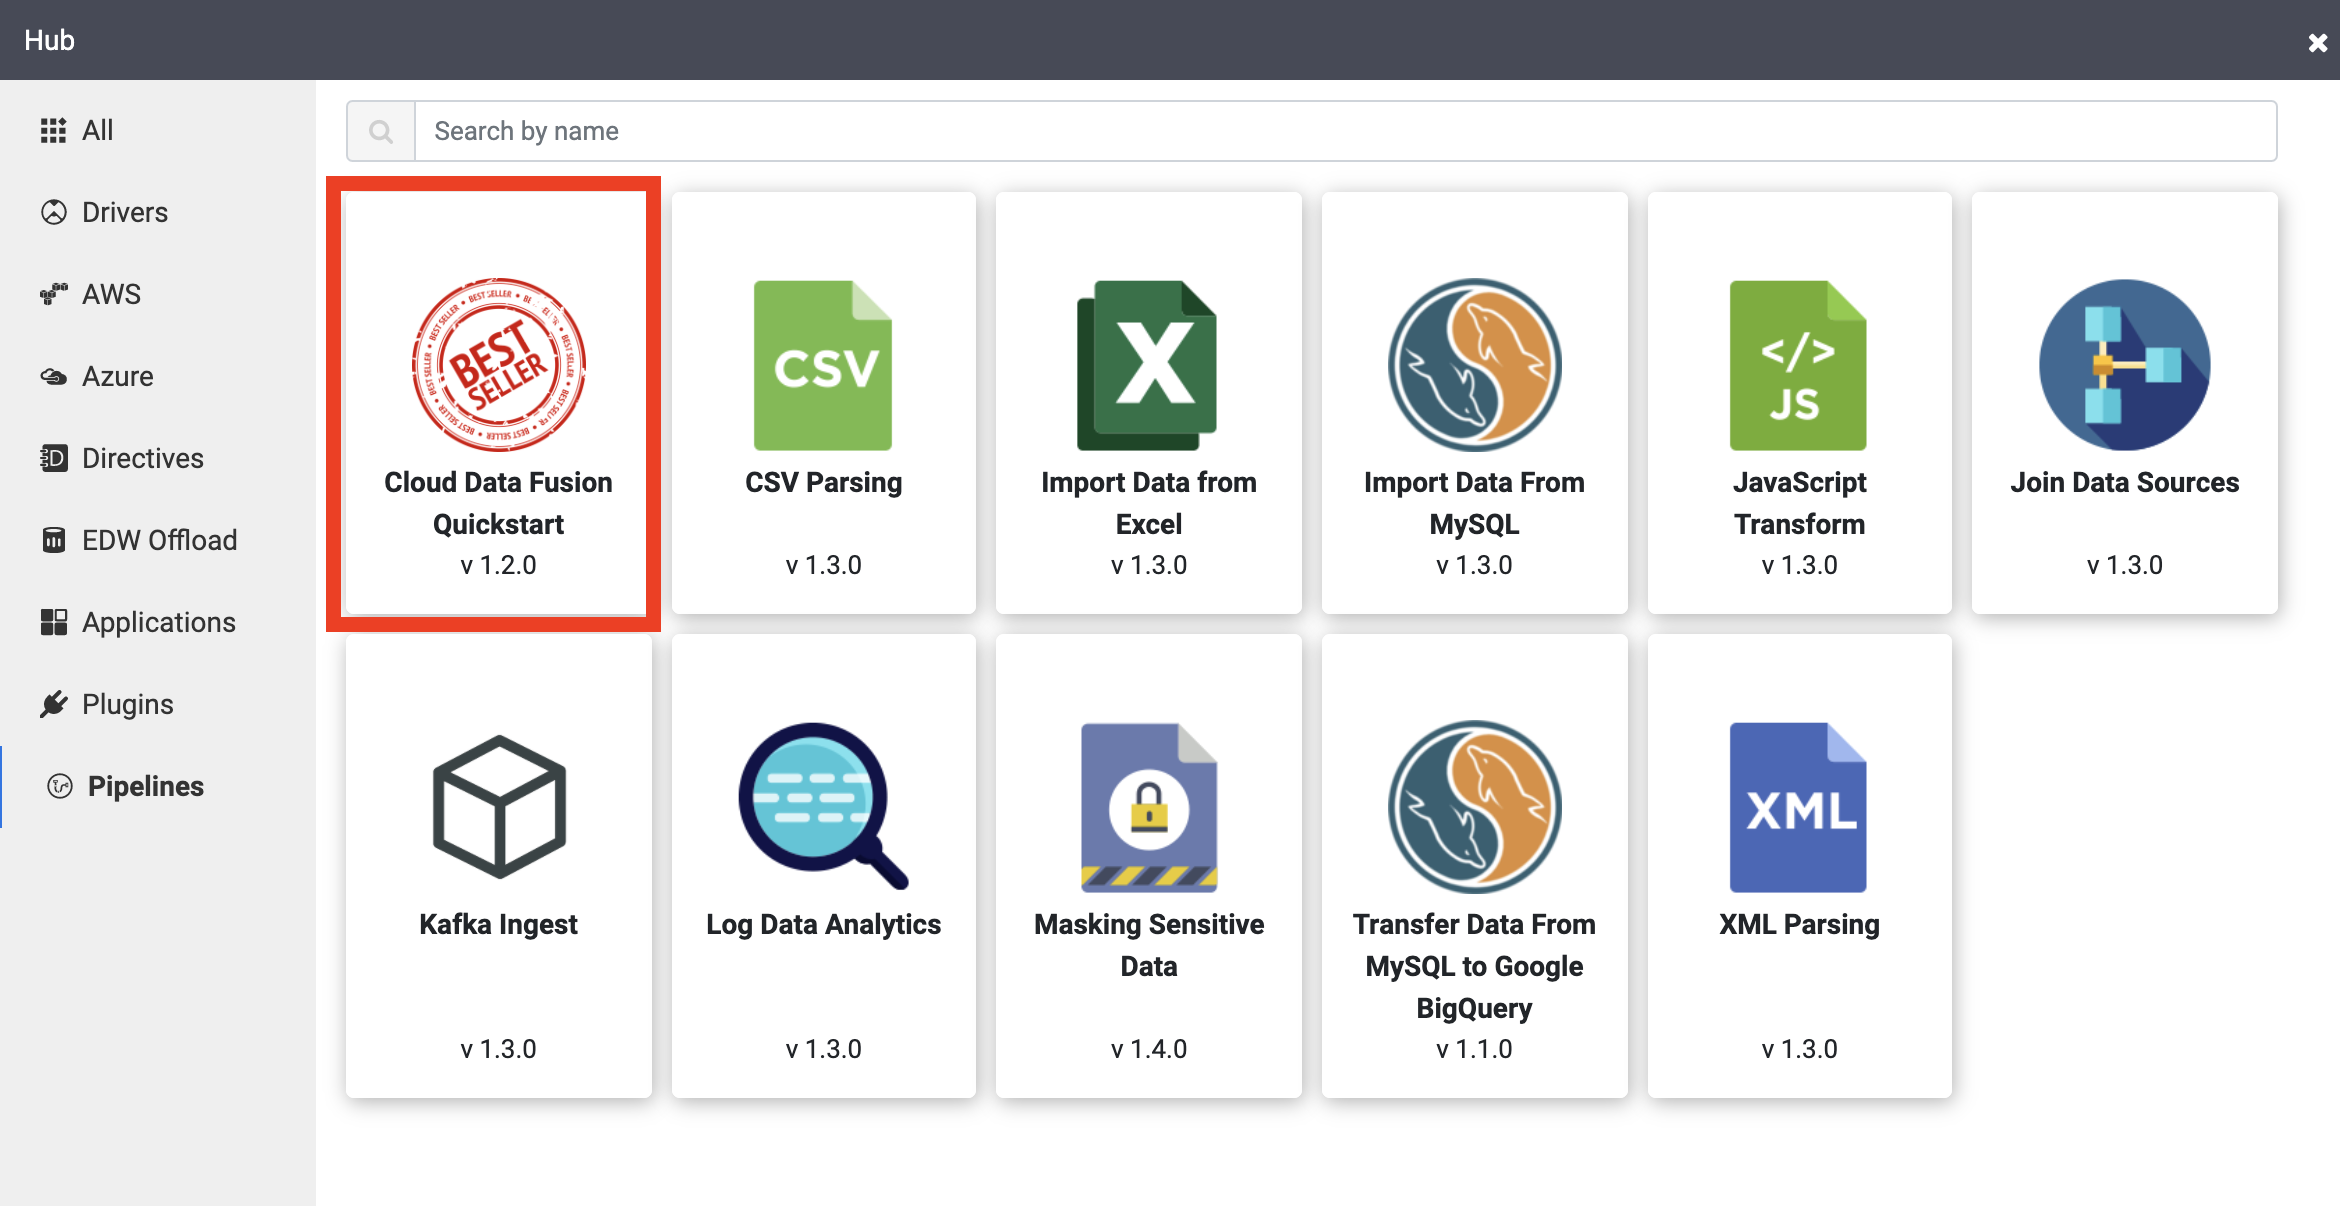
In the left panel, click Pipelines.
-
Click the Cloud Data Fusion Quickstart pipeline, and then click Create on the popup that appears.
-
In the Cloud Data Fusion Quickstart configuration panel, click Finish.
-
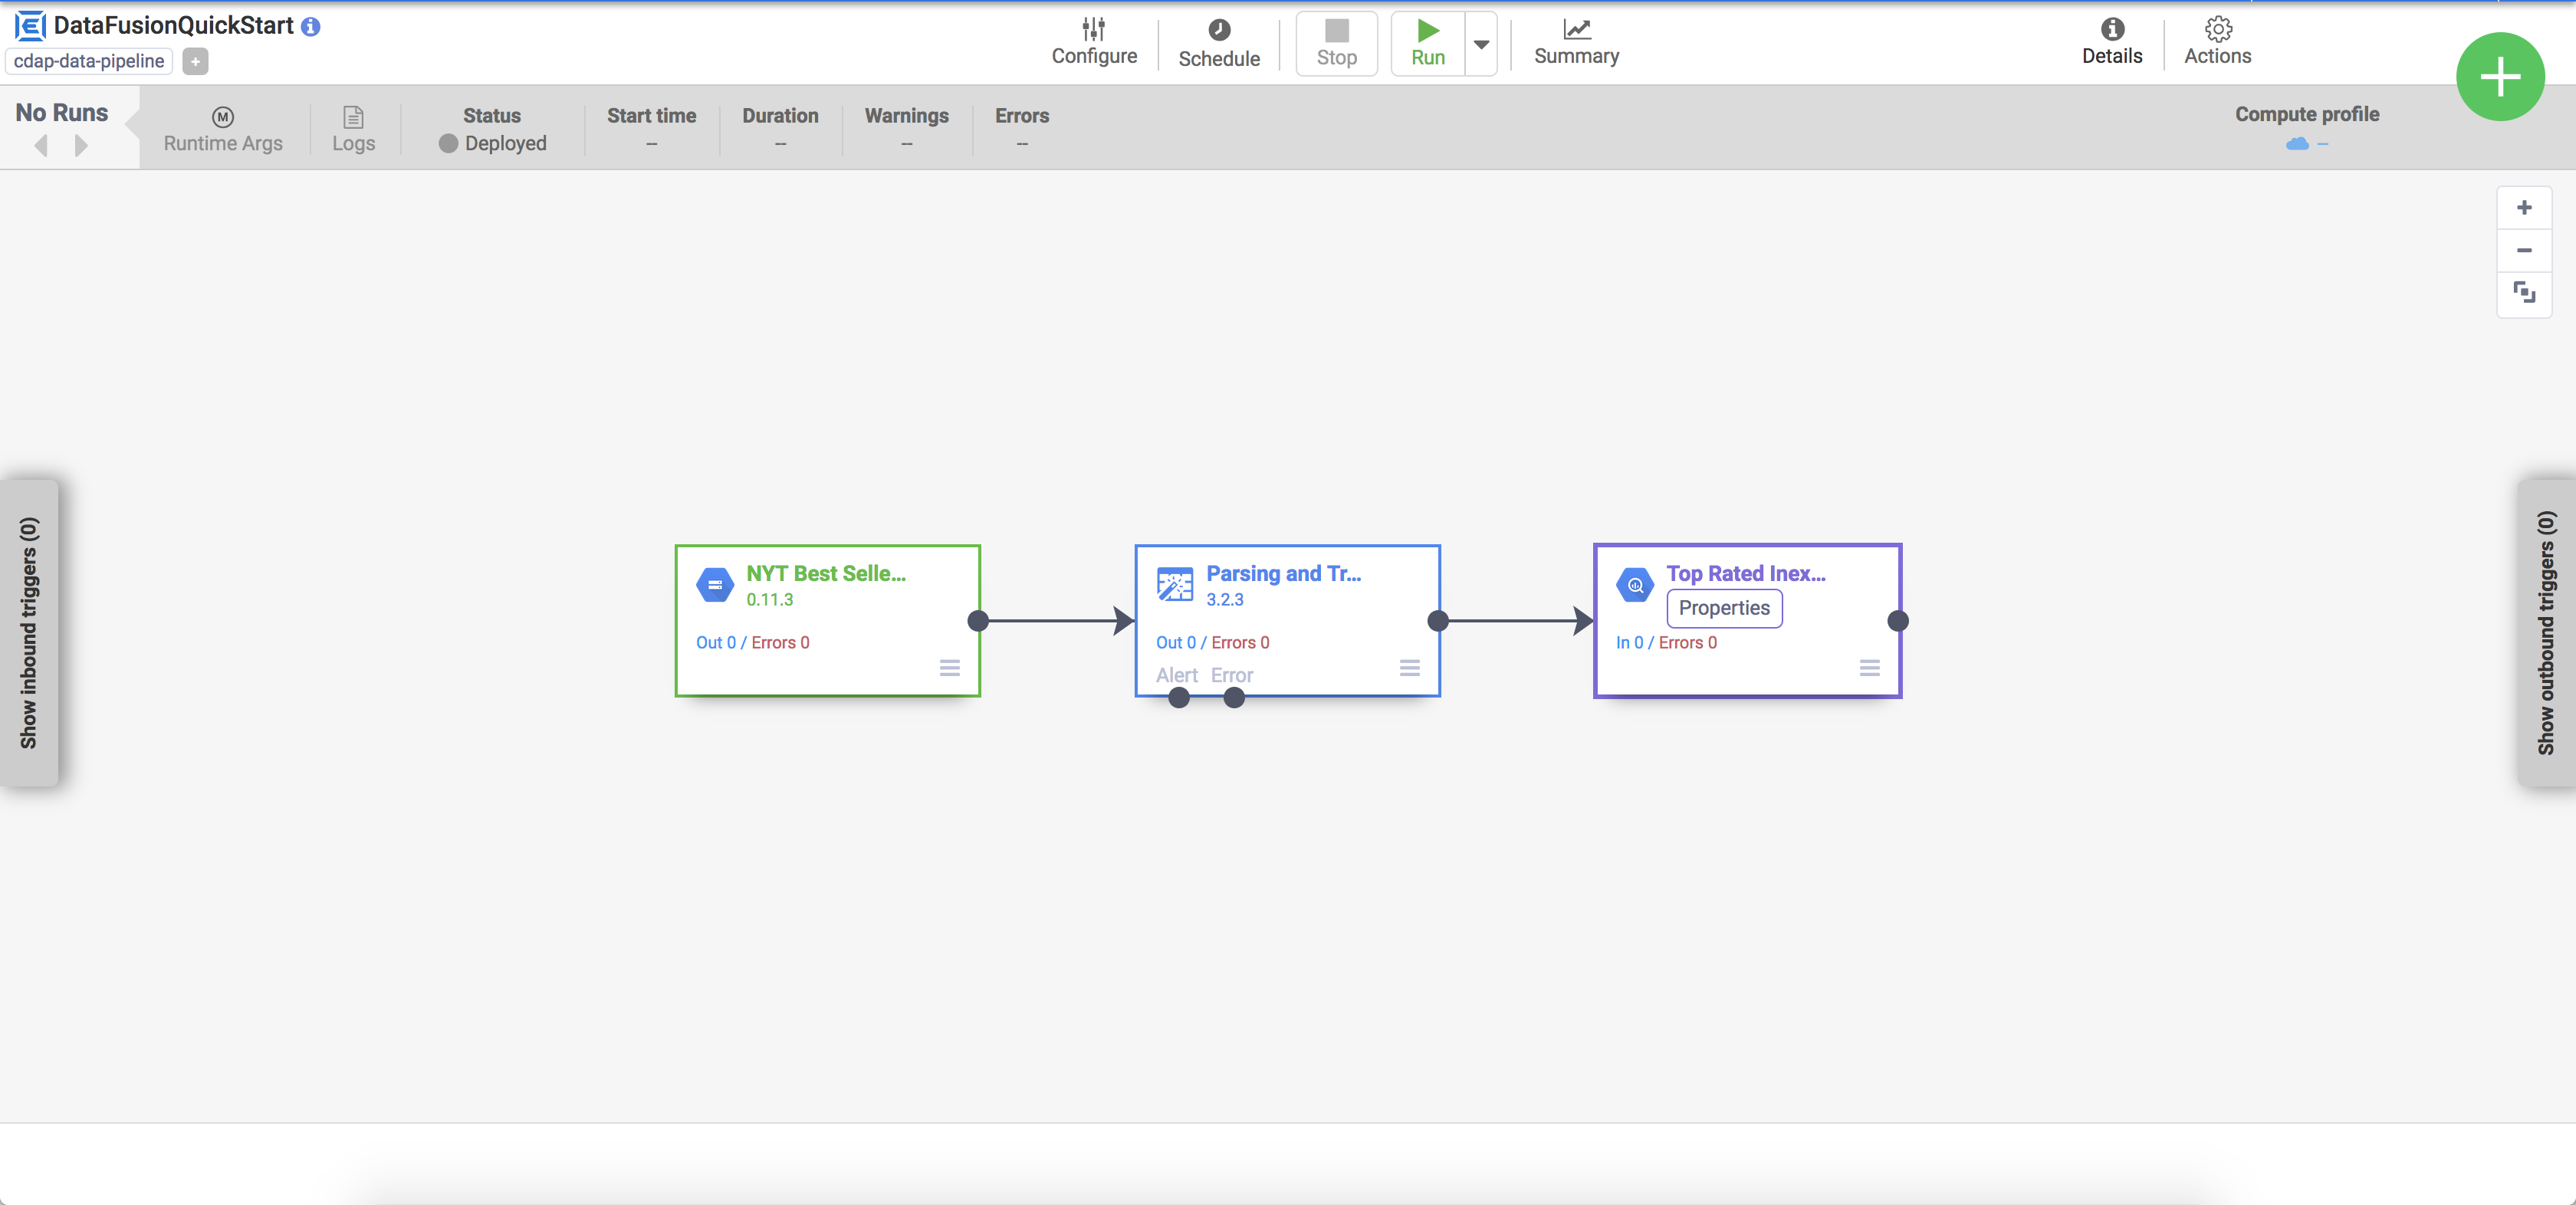
Click Customize Pipeline. A visual representation of your pipeline appears in the Pipeline Studio, which is a graphical interface for developing data integration pipelines. Available pipeline plugins are listed on the left, and your pipeline is displayed on the main canvas area. You can explore your pipeline by holding the pointer over each pipeline node and clicking the Properties button that appears. The Properties menu for each node allows you to view the objects and operations associated with the node.
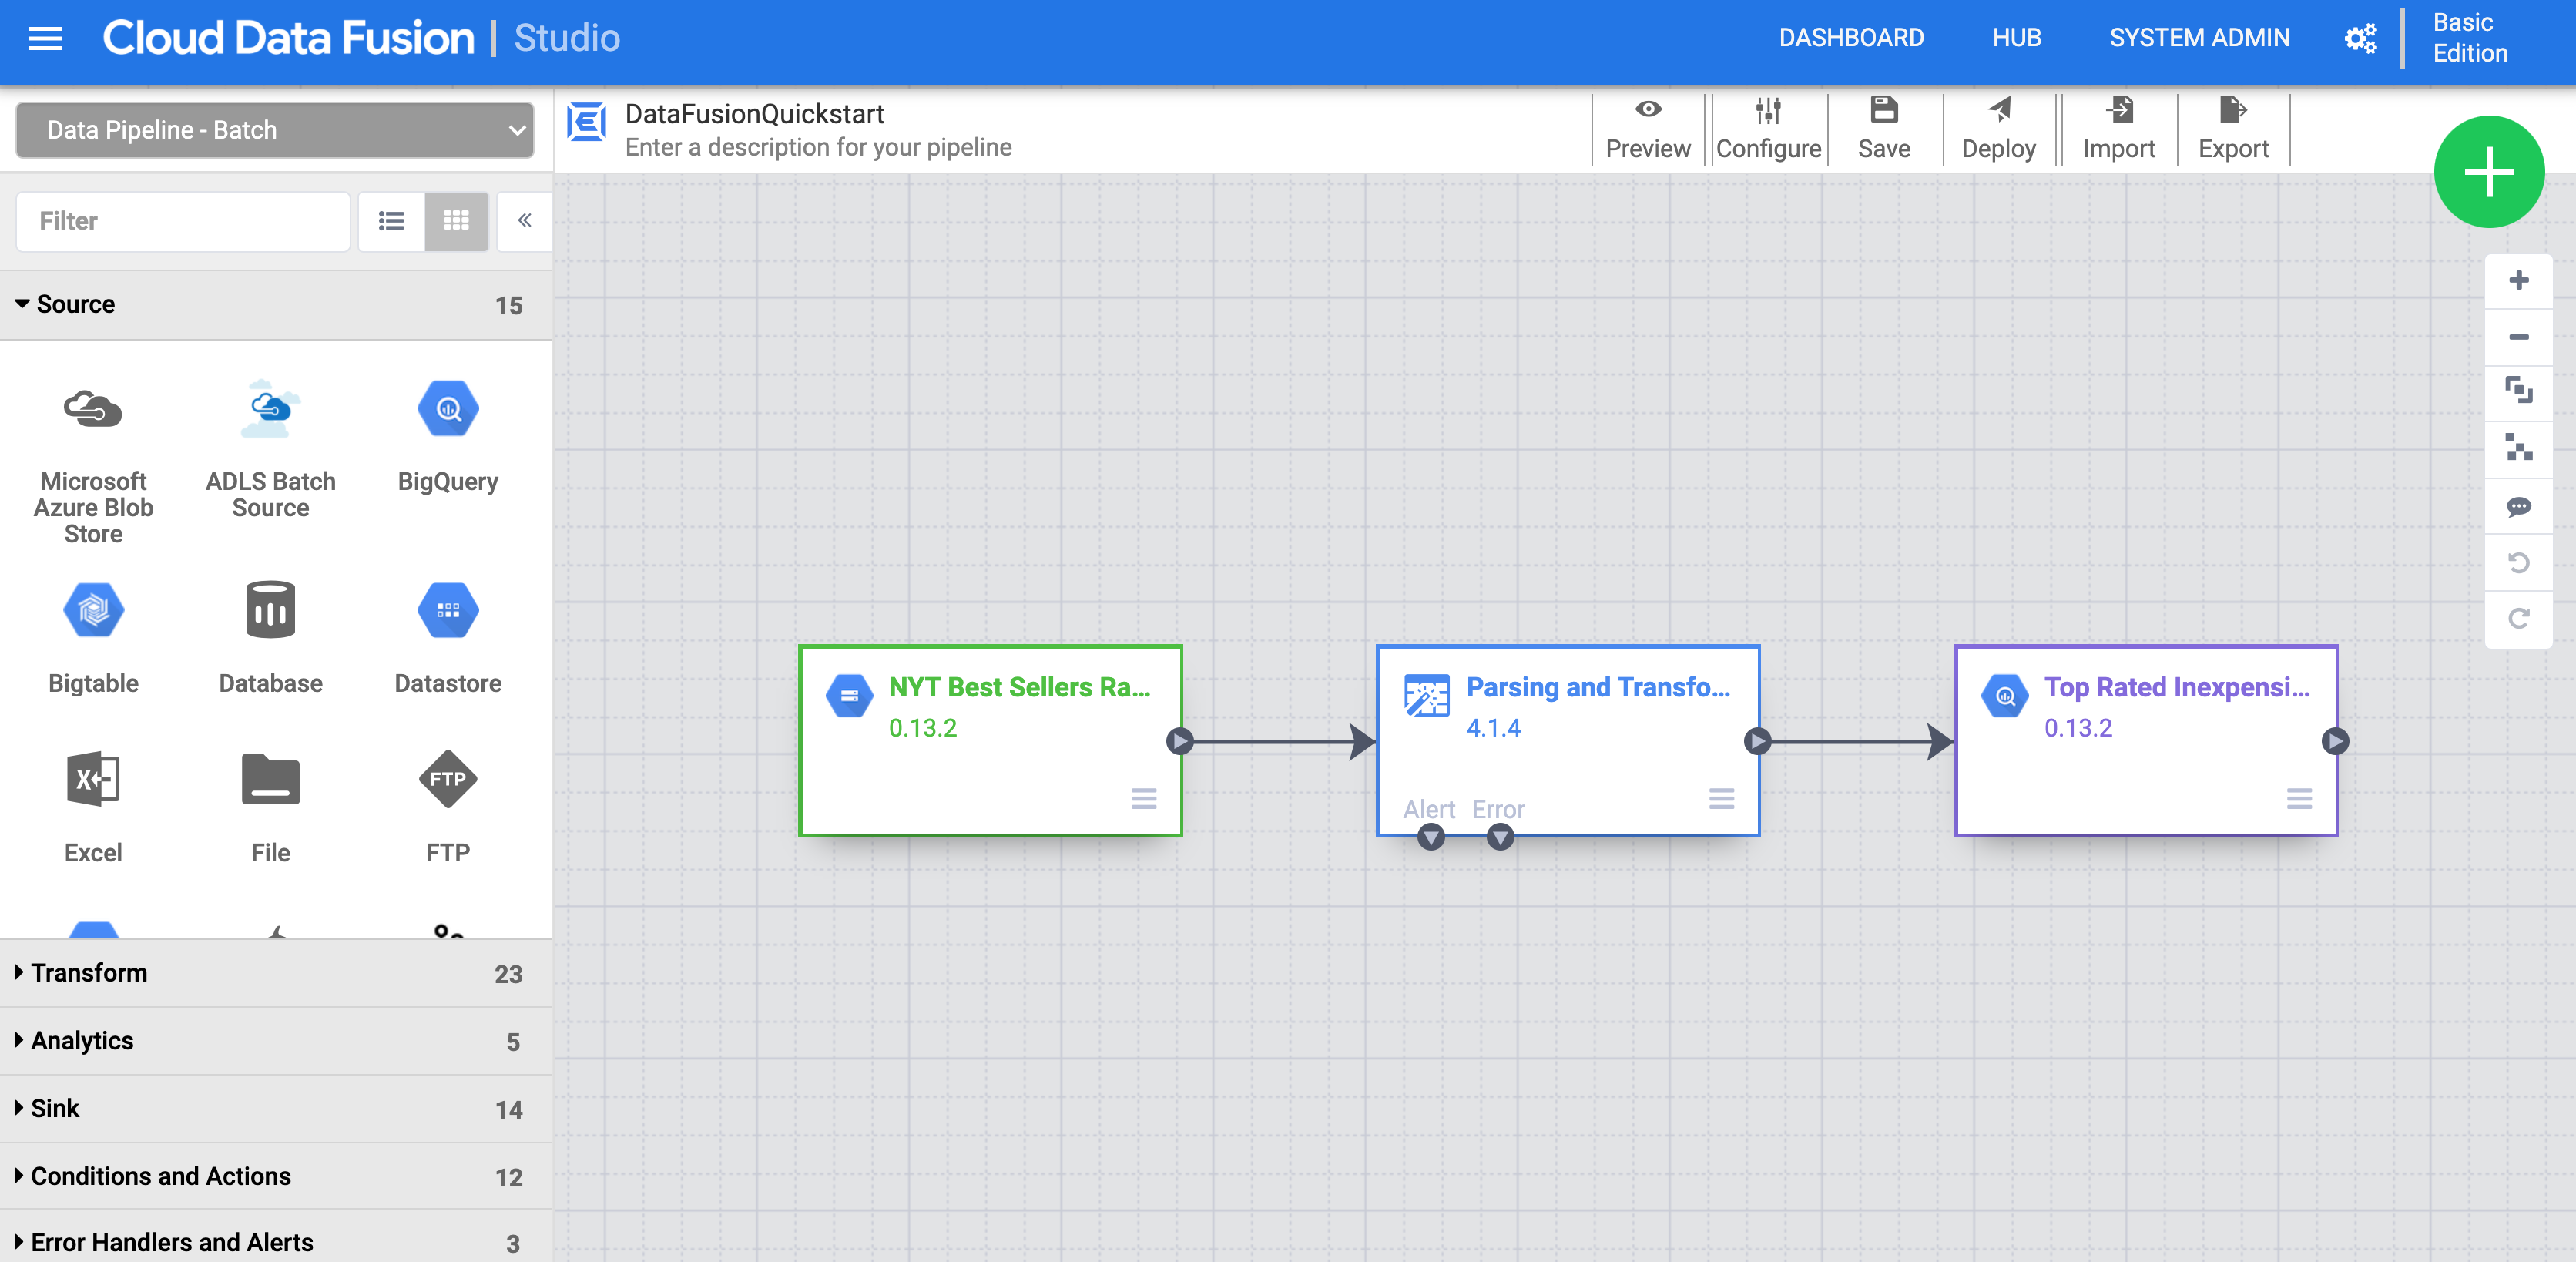
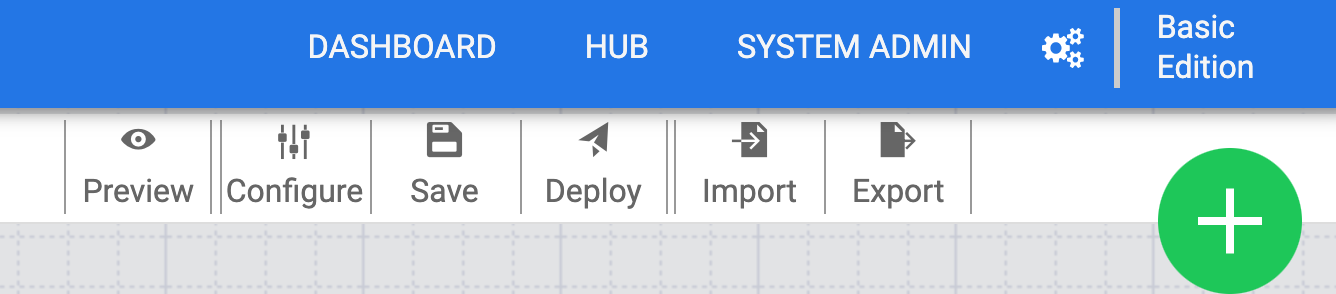
- In the top right menu, click Deploy. This submits the pipeline to Cloud Data Fusion. You will execute the pipeline in the next section.
Task 5. View your pipeline
The deployed pipeline appears in the pipeline details view, where you can do the following:
-
View the pipeline's structure and configuration.
-
Run the pipeline manually or set up a schedule or a trigger.
-
View a summary of the pipeline's historical runs, including execution times, logs, and metrics.
Task 6. Execute your pipeline
- In the pipeline details view, click on Run in the top center to execute your pipeline.
- After a few minutes, the pipeline finishes. The pipeline Status changes to Succeeded and the number of records processed by each node is displayed.
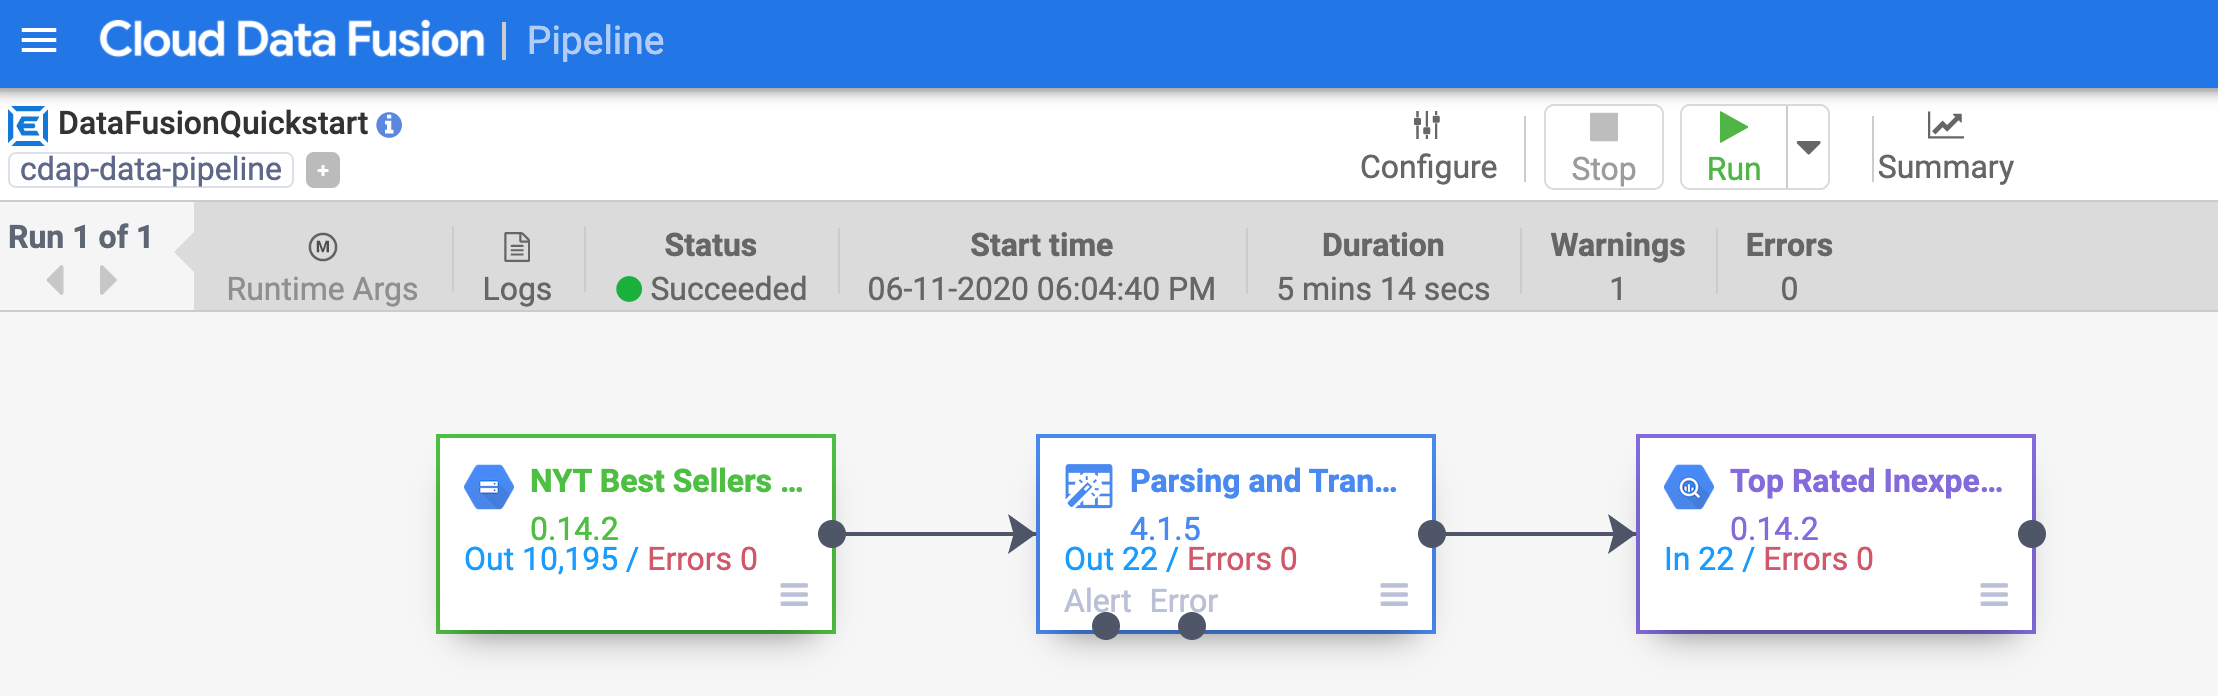
Click Check my progress to verify the objective.
Task 7. View the results
The pipeline writes output into a BigQuery table. You can verify that using the following steps.
-
Click to open this link to the BigQuery UI in Cloud console or right-click on the console tab and select Duplicate, then use the Navigation menu to select BigQuery.
-
In the left pane, click your
Project ID(it will start withqwiklabs). -
Under the GCPQuickstart dataset in your project, click the top_rated_inexpensive table, then run a simple query, such as:
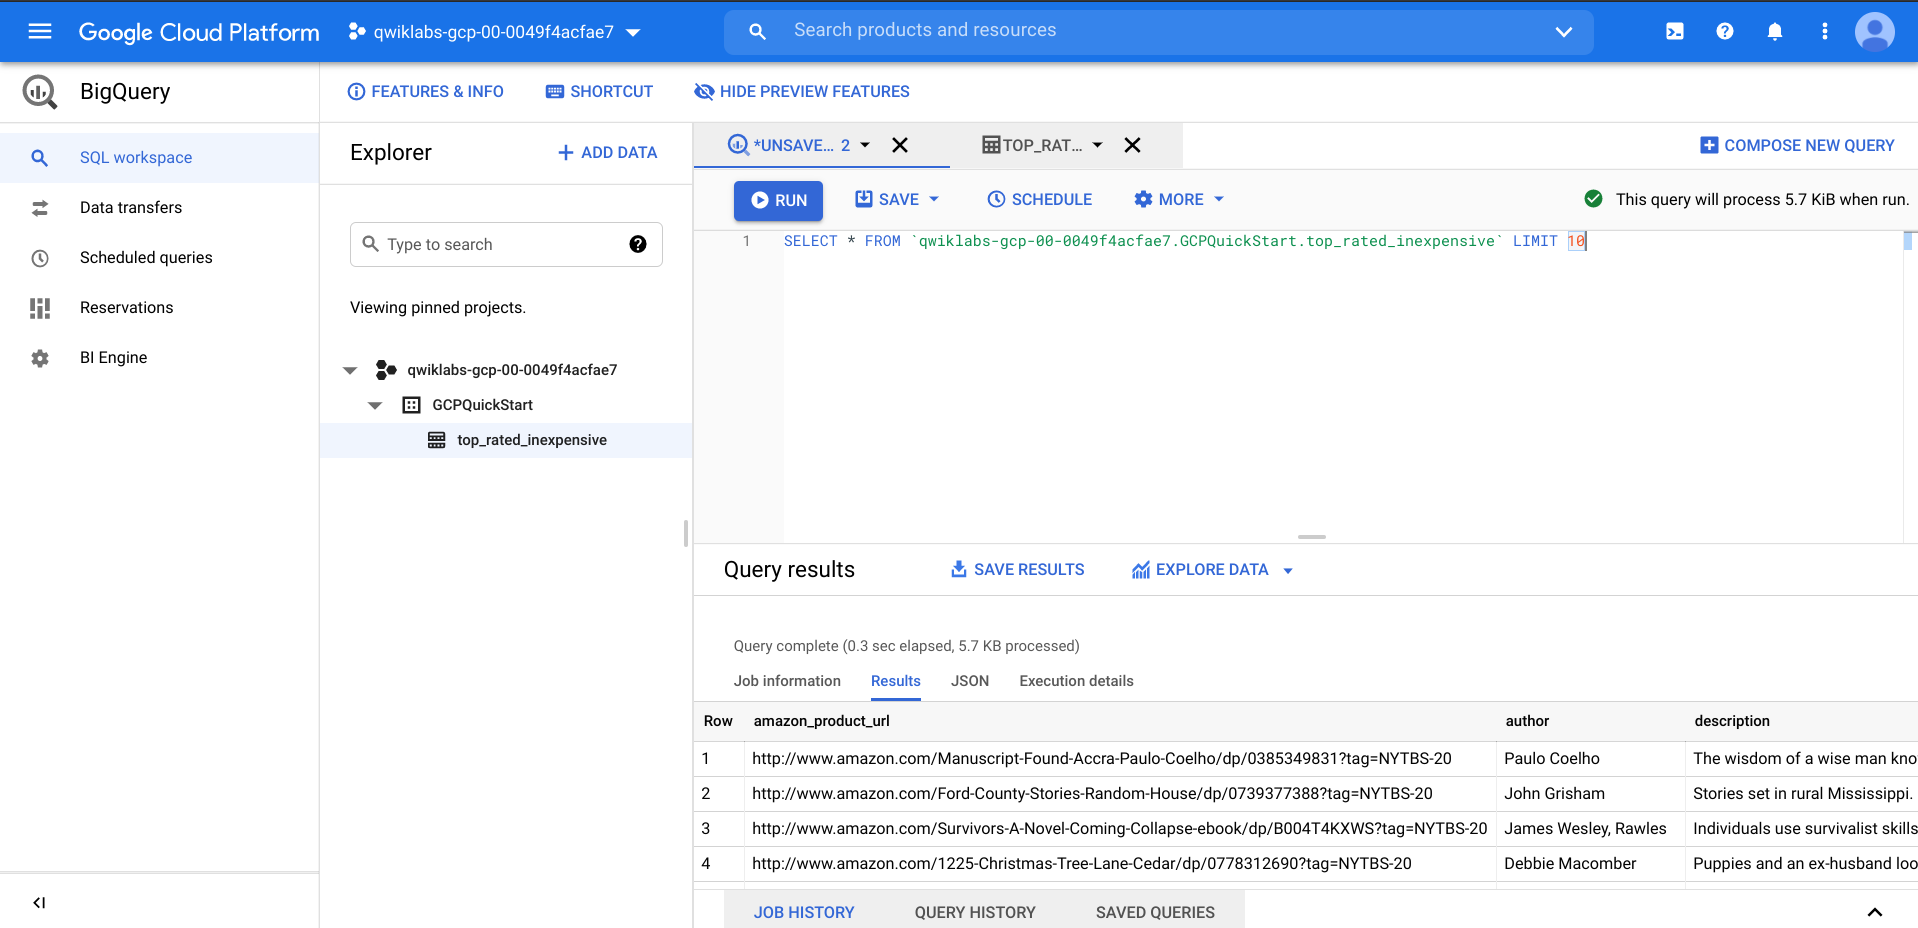
Click Check my progress to verify the objective.
Congratulations!
In this lab, you learned how to create a Data Fusion instance and deploy a sample pipeline that reads an input file from Cloud Storage, transforms and filters the data to output a subset of the data into BigQuery.
End your lab
When you have completed your lab, click End Lab. Qwiklabs removes the resources you’ve used and cleans the account for you.
You will be given an opportunity to rate the lab experience. Select the applicable number of stars, type a comment, and then click Submit.
The number of stars indicates the following:
- 1 star = Very dissatisfied
- 2 stars = Dissatisfied
- 3 stars = Neutral
- 4 stars = Satisfied
- 5 stars = Very satisfied
You can close the dialog box if you don't want to provide feedback.
For feedback, suggestions, or corrections, please use the Support tab.
Manual Last Updated October 11, 2022
Lab Last Tested October 11, 2022
Copyright 2022 Google LLC All rights reserved. Google and the Google logo are trademarks of Google LLC. All other company and product names may be trademarks of the respective companies with which they are associated.