检查点
Create a GKE cluster
/ 10
Install Anthos Service Mesh
/ 10
Configure sidecar injection
/ 10
Deploy ResNet50
/ 10
Create ConfigMap
/ 10
Create TensorFlow Serving deployment for ResNet50 model
/ 10
Configure Istio Ingress gateway
/ 10
Deploy ResNet101 as a canary release
/ 10
Configure weighted load balancing
/ 10
Configure focused canary testing
/ 10
Implementing Canary Releases of TensorFlow Model Deployments with Kubernetes and Anthos Service Mesh
- GSP778
- Overview
- Setup and requirements
- Lab tasks
- Task 1. Set up your project
- Task 2. Set up your GKE cluster
- Task 3. Install an ingress gateway
- Task 4. Enable sidecar injection
- Task 5. Deploying ResNet50
- Task 5. Creating ConfigMap
- Task 6. Creating TensorFlow Serving deployment of the ResNet50 model.
- Task 7. Install an ingress gateway
- Task 8. Testing access to the ResNet50 model
- Task 9. Deploying ResNet101 as a canary release
- Task 10. Configuring weighted load balancing
- Task 11. Configuring focused canary testing
- Congratulations
GSP778

Overview
Istio is an open source framework for connecting, securing, and managing microservices, including services running on Kubernetes Engine. It lets you create a mesh of deployed services with load balancing, service-to-service authentication, monitoring, and more, without requiring any changes in service code.
Anthos Service Mesh (ASM) is powered by Istio. With Anthos Service Mesh, you get an Anthos tested, fully supported, distribution of Istio, letting you create and deploy a service mesh with Anthos GKE, whether your cluster is operating in Google Cloud or on-premises.
This lab shows you how to use Anthos Service Mesh on Google Kubernetes Engine (GKE) and TensorFlow Serving to create canary deployments of TensorFlow machine learning models.
What you'll learn
In this lab, you will learn how to:
- Provision a cluster on Google Kubernetes Engine (GKE)
- Install and configure Anthos Service Mesh
- Create a canary release of a TensorFlow model deployment.
- Configure various traffic splitting strategies.
Prerequisites
To successfully complete the lab you need to have a solid understanding of how to save and load TensorFlow models and a basic familiarity with Kubernetes and Istio concepts and architecture. Before proceeding with the lab reviewing the following resources is recommended:
Lab scenario
In the lab, you will deploy two versions of the ResNet model. The idea behind a canary deployment is to introduce a new version of a service (model deployment) by first testing it using a small percentage of user traffic, and then if the new model meets the set requirements, redirect, possibly gradually in increments, the traffic from the old version to the new one.
In its simplest form, the traffic sent to the canary version is a randomly selected percentage of requests sent to a common endpoint that exposes both models. The more sophisticated traffic splitting schemas can also be used. For example, the traffic can be split based on the originating region, user or user group, or other properties of the request. When the traffic is split based on well defined groups of originators, the canary deployment can be used as a foundation of A/B testing.
You will use TensorFlow Serving to deploy two versions of ResNet: ResNet50 and ResNet101. Both models expose the same interface (inputs and outputs). ResNet50 will be a simulated production model. ResNet101 will be a new, canary release.
TensorFlow Serving is a flexible, high-performance serving system for machine learning models, designed for production environments. TensorFlow Serving makes it easy to deploy new algorithms and experiments, while keeping the same server architecture and APIs. TensorFlow Serving provides out-of-the-box integration with TensorFlow models, but can be easily extended to serve other types of models and data. TensorFlow Serving can be run in a docker container and deployed and managed by Kubernetes. In the lab, you will deploy TensorFlow Serving as a Kubernetes Deployment on Google Cloud Kubernetes Engine (GKE).
Istio will be used to configure transparent traffic splitting between both deployments. Both models will be exposed through the same external endpoint. You will use Istio's traffic management features to experiment with various traffic splitting strategies.
Summary of the tasks performed during the lab:
- Provision a cluster on Google Kubernetes Engine (GKE)
- Install and configure Anthos Service Mesh
- Deploying ResNet models using TensorFlow Serving
- Configuring Istio Ingress gateway
- Configuring Istio virtual services and destination rules
- Configuring weight based routing
- Configuring content based routing
Setup and requirements
Before you click the Start Lab button
Read these instructions. Labs are timed and you cannot pause them. The timer, which starts when you click Start Lab, shows how long Google Cloud resources will be made available to you.
This hands-on lab lets you do the lab activities yourself in a real cloud environment, not in a simulation or demo environment. It does so by giving you new, temporary credentials that you use to sign in and access Google Cloud for the duration of the lab.
To complete this lab, you need:
- Access to a standard internet browser (Chrome browser recommended).
- Time to complete the lab---remember, once you start, you cannot pause a lab.
How to start your lab and sign in to the Google Cloud console
-
Click the Start Lab button. If you need to pay for the lab, a pop-up opens for you to select your payment method. On the left is the Lab Details panel with the following:
- The Open Google Cloud console button
- Time remaining
- The temporary credentials that you must use for this lab
- Other information, if needed, to step through this lab
-
Click Open Google Cloud console (or right-click and select Open Link in Incognito Window if you are running the Chrome browser).
The lab spins up resources, and then opens another tab that shows the Sign in page.
Tip: Arrange the tabs in separate windows, side-by-side.
Note: If you see the Choose an account dialog, click Use Another Account. -
If necessary, copy the Username below and paste it into the Sign in dialog.
{{{user_0.username | "Username"}}} You can also find the Username in the Lab Details panel.
-
Click Next.
-
Copy the Password below and paste it into the Welcome dialog.
{{{user_0.password | "Password"}}} You can also find the Password in the Lab Details panel.
-
Click Next.
Important: You must use the credentials the lab provides you. Do not use your Google Cloud account credentials. Note: Using your own Google Cloud account for this lab may incur extra charges. -
Click through the subsequent pages:
- Accept the terms and conditions.
- Do not add recovery options or two-factor authentication (because this is a temporary account).
- Do not sign up for free trials.
After a few moments, the Google Cloud console opens in this tab.

Activate Cloud Shell
Cloud Shell is a virtual machine that is loaded with development tools. It offers a persistent 5GB home directory and runs on the Google Cloud. Cloud Shell provides command-line access to your Google Cloud resources.
- Click Activate Cloud Shell
at the top of the Google Cloud console.
When you are connected, you are already authenticated, and the project is set to your Project_ID,
gcloud is the command-line tool for Google Cloud. It comes pre-installed on Cloud Shell and supports tab-completion.
- (Optional) You can list the active account name with this command:
- Click Authorize.
Output:
- (Optional) You can list the project ID with this command:
Output:
gcloud, in Google Cloud, refer to the gcloud CLI overview guide.
Lab tasks
You will use Cloud Shell and Cloud Console for all of the tasks in the lab. Some tasks require you to edit text files. You can use any of the classic command line text editors pre-installed in Cloud Shell, including vim, emacs, or nano. You can also use the built-in Cloud Shell Editor.
Before proceeding, make sure that you completed the Activate Cloud Shell step in the Setup and requirements instructions and your Cloud Shell is open and ready.
Task 1. Set up your project
Getting lab files
- Start by getting the lab files from GitHub:
Configure environment variables
- Configure environment variables that will be used in the setup and installation commands:
- WORKLOAD_POOL will be used to enable Workload Identity, which is the recommended way to safely access Google Cloud services from GKE applications.
Task 2. Set up your GKE cluster
Create the cluster
- Now run the following command in Cloud Shell to create the Kubernetes cluster
cluster-1:
Output:
It will take several minutes for cluster creation to complete. After the command completes, the output provides the cluster details.
- After your cluster is created, run this command to ensure you have the
cluster-adminrole on your cluster:
Click Check my progress to verify the objective.
Prepare to install Anthos Service Mesh
You will use asmcli to install Anthos Service Mesh on your cluster.
- Download the version that installs Anthos Service Mesh 1.15.0 to the current working directory:
- Make the script executable:
Install Anthos Service Mesh
The following command will install Anthos Service Mesh. The --enable_all flag allows the script to enable the required Google APIs, set Identity and Access Management permissions, and make the required updates to your cluster, which includes enabling GKE Workload Identity:
Click Check my progress to verify the objective.
Task 3. Install an ingress gateway
Anthos Service Mesh gives you the option to deploy and manage gateways as part of your service mesh. A gateway describes a load balancer operating at the edge of the mesh receiving incoming or outgoing HTTP/TCP connections. Gateways are Envoy proxies that provide you with fine-grained control over traffic entering and leaving the mesh.
- Create a namespace for the ingress gateway if you don't already have one. Gateways are user workloads, and as a best practice, they shouldn't be deployed in the control plane namespace.
-
Enable auto-injection on the gateway by applying a revision label on the gateway namespace. The revision label is used by the sidecar injector webhook to associate injected proxies with a particular control plane revision.
- Use the following command to locate the revision label on
istiodand store that value in an environment variable:
REVISION=$(kubectl get deploy -n istio-system -l app=istiod -o \ jsonpath={.items[*].metadata.labels.'istio\.io\/rev'}'{"\n"}') - Apply the revision label to the namespace. In the following command, REVISION is the value of the istiod revision label that you noted in the previous step:
kubectl label namespace $GATEWAY_NS \ istio.io/rev=$REVISION --overwrite - Use the following command to locate the revision label on
-
Change to the directory that you specified in
--output_dir:
- You can deploy the example ingress gateway configuration located in the
samples/gateways/istio-ingressgateway/directory as is, or modify it as needed:
Task 4. Enable sidecar injection
Anthos Service Mesh uses sidecar proxies to enhance network security, reliability, and observability. With Anthos Service Mesh, these functions are abstracted away from an application's primary container and implemented in a common out-of-process proxy delivered as a separate container in the same Pod.
- To configure automatic sidecar injection execute the following command.
"istio-injection" not found in the output. That means that the namespace didn't previously have the istio-injection label, which you should expect in new installations of Anthos Service Mesh or new deployments.
Click Check my progress to verify the objective
Task 5. Deploying ResNet50
As described in the lab scenario overview section, the ResNet50 model will represent a current production model and the ResNet101 will be a canary release.
The pretrained models in the SavedModel format have been uploaded to a public Cloud Storage location.
You will first download the model files to a storage bucket in your project. Since storage buckets are a global resource in Google Cloud you have to use a unique bucket name. For the purpose of this lab, you can use your project id as a name prefix.
- To create a storage bucket in your project:
- After the bucket has been created, copy the model files:
- Even though you copied the model files into the bucket you created, the pods on your GKE cluster won't be able to access the storage bucket to read these files. This is because GKE clusters don't have access to other services on Google Cloud, like Cloud Storage. There are many ways to authorize pods in GKE clusters to access other Google Cloud Services. The simplest and most secure way to accomplish this is with Workload Identity.
Workload identity was enabled on your cluster at the time of creation. In addition, you also need to configure your deployment to use Workload Identity. This involves creating and assigning a Kubernetes service account to your deployment. This Kubernetes Service account must be given privileges to read files from your newly created Cloud Storage bucket by configuring it to act as an IAM service account with the necessary roles for reading objects from your bucket. Read more about creating and configuring Kubernetes Service Accounts with required privileges and associating them with your deployments here.
Although configuring Workload identity is the best practice to solve access management to your Cloud Storage bucket, we won't be following this since it is out of scope for the current lab. Instead, you will simply make the contents of your storage bucket publicly accessible. Note that this is not recommended and you should always try to use Workload Identity to resolve this issue.
Run the following command to ensure that uniform bucket-level access is enabled for your Google Cloud Storage bucket:
Run the following command to make the bucket publicly accessible:
Click Check my progress to verify the objective
You are now ready to create a TensorFlow Serving deployment and configure it to serve the ResNet50 model. You will deploy TF Serving in three steps:
- First you will create a Kubernetes ConfigMap that points to the location of the ResNet50 model in your storage bucket
- Then, you will create a Kubernetes Deployment using a standard TensorFlow Serving image from Docker Hub.
- When the deployment is ready, you will create a Kubernetes Service to provide an interface to the model deployment.
Task 5. Creating ConfigMap
- Change directory to
tfserving-canary
- Use the
sedcommand to update theMODEL_NAMEfield in thetf-serving/configmap-resnet50.yamlfile to reference your bucket.
After the update, the configmap-resnet50.yaml should look similar to the one below:
- Using
kubectlcreate the ConfigMap:
Click Check my progress to verify the objective
Task 6. Creating TensorFlow Serving deployment of the ResNet50 model.
- Inspect the manifest for the TensorFlow Serving deployment.
Notice that the deployment is annotated with two labels: app: image-classifier and version: resnet50. These labels will be the key when configuring Istio traffic routing.
- Create the deployment:
It may take a few minutes before the deployment is ready.
- To check the status of the deployment:
Wait until the READY column in the output of the previous command changes to 1/1.
You will now configure a Kubernetes service that exposes a stable IP address and DNS name.
- Inspect the service manifest is in the
tf-serving/service.yamlfile.
The selector field refers to the app: image-classifier label. What it means is that the service will load balance across all pods annotated with this label. At this point these are the pods comprising the ResNet50 deployment. The service type is ClusterIP. The IP address exposed by the service is only visible within the cluster.
- To create the service execute the following command:
Click Check my progress to verify the objective
Task 7. Install an ingress gateway
Anthos Service Mesh gives you the option to deploy and manage gateways as part of your service mesh. A gateway describes a load balancer operating at the edge of the mesh receiving incoming or outgoing HTTP/TCP connections. Gateways are Envoy proxies that provide you with fine-grained control over traffic entering and leaving the mesh.
- The gateway manifest in the
tf-serving/gateway.yamlfile configures the gateway to open port 80 for theHTTPtraffic:
- To create the gateway execute the below command:
At this point the gateway is running but your ResNet50 deployment is still not accessible from the outside of the cluster. You need to configure a virtual service.
Virtual services, along with destination rules are the key building blocks of Istio’s traffic routing functionality. A virtual service lets you configure how requests are routed to a service within an Istio service mesh. Each virtual service consists of a set of routing rules that are evaluated in order, letting Istio match each given request to the virtual service to a specific real destination within the mesh.
You will start by configuring a virtual service that forwards all requests sent through the gateway on port 80 to the image-classifier service on port 8501.
- Recall that the
image-classifierservice is configured to load balance between pods annotated with theapp: image-classiferlabel:
As a result all requests sent to the gateway will be forwarded to the ResNet50 deployment.
- To create the virtual service execute the below command:
Click Check my progress to verify the objective
Task 8. Testing access to the ResNet50 model
The ResNet50 deployment can now be accessed from outside of the cluster. You can test it by submitting a request using the curl command.
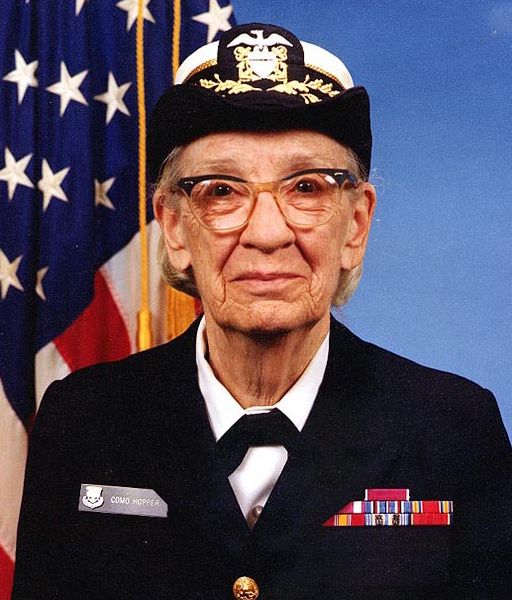
In the payloads folder you can find a sample request body (request-body.json) formatted to conform to the TensorFlow Serving REST API. It contains a picture of Grace Hopper.
To send the request you need an external IP address and a port exposed by the Istio gateway.
- Set the ingress IP and port:
- Set the gateway URL:
- The TensorFlow Serving REST prediction endpoint is accessible at
http://host:port/v1/models/${MODEL_NAME}[/versions/${VERSION}|/labels/${LABEL}]:predictwhere/versions/${VERSION}or/labels/${LABEL}are optional. If omitted the latest version is used.
http://$GATEWAY_URL/v1/models/image_classifier:predict
To send the request to the model invoke the below command:
The response returned by the model includes the list of 5 most likely labels with the associated probabilities. The response should look similar to the one below:

Note that the model ranked the military uniform label with the probability of around 45%.
Task 9. Deploying ResNet101 as a canary release
You will now deploy the ResNet101 model as a canary release. As in the case of the ResNet50 model, ResNet101 will be deployed as a Kubernetes Deployment annotated with the app label set to image-classifier. Recall that the image-classifier Kubernetes service is configured to load balance between pods that contain the app label set to this value and that the Istio virtual service is configured to forward all the traffic from the Istio Ingress gateway to the image-classifier service.
If you deployed ResNet101 without any changes to the Istio virtual service the incoming traffic would be load balanced across pods from both deployments using a round-robin strategy. To have a better control over which requests go to which deployment you need to configure a destination rule and modify the virtual service.
Along with virtual services, destination rules are a key part of Istio’s traffic routing functionality. Destination rules allow much finer control over traffic destinations. In particular, you can use destination rules to specify name service subsets, such as grouping all a given service's instances by version. You can then use these service subsets in routing rules of virtual services to control the traffic to different instances of your service.
- In this case, the destination rule configures two different subsets of the
image-classifierservice using theversionlabel as a selector, in order to differentiate between ResNet50 and ResNet101 deployments:
- Recall that the ResNet50 deployment is annotated with two labels:
app: image-classifierandversion: resnet50. The ResNet101 deployment is also annotated with the same labels. The value of theapplabel is the same but the value of theversionlabel is different:
The destination rule allows the virtual service to route traffic between two deployments behind the image-classifier service.
- To create the destination rule:
The final step is to reconfigure the virtual service to use the destination rule.
- You will start by modifying the virtual service to route all requests from the Ingress gateway to the
resnet50service subset:
Notice how the weight field is used to redirect 100% of traffic to the resnet50 subset of the image-classifier service.
- To apply the changes:
Now deploy the ResNet101 model using the same process as for the ResNet50 model. Refer back to the steps above to the kubectl commands for applying updates to the configmaps and deployment configurations.
- Update the
tf-serving/configmap-resnet101.yamlto point to thegs://[YOUR_BUCKET]/resnet_101location.
- Apply the
tf-serving/configmap-resnet101.yamlmanifest.
- Apply the
tf-serving/deployment-resnet101.yamlmanifest.
- Wait for the deployment to start successfully.
Click Check my progress to verify the objective
At this point the ResNet101 deployment is ready but the virtual service is configured to route all requests to ResNet50.
- Verify this by sending a few prediction requests:
All requests return the same result.
Task 10. Configuring weighted load balancing
You will now reconfigure the Istio virtual service to split the traffic between the ResNet50 and ResNet101 models using weighted load balancing - 70% requests will go to ResNet50 and 30% to ResNet101.
- The manifest for the new configuration is in the
tf-serving/virtualservice-weight-70.yamlfile:
- To apply the manifest:
Click Check my progress to verify the objective
- Send a few more requests - more than 10:
Notice that responses are now different. The probability assigned to the military uniform label is around 94% for some responses and %45 for the others. The 94% responses are from the ResNet101 model.
- As an optional task, reconfigure the virtual service to route 100% traffic to the ResNet101 model.
Task 11. Configuring focused canary testing
In the previous steps you learned how to control fine-grained traffic percentages. Istio routing rules allow for much more sophisticated canary testing scenarios.
In this section, you will reconfigure the virtual service to route traffic to the canary deployment based on request headers. This approach allows a variety of scenarios, including routing requests from a specific group of users to the canary release. Assume that the request from the canary users will carry a custom header user-group. If this header is set to canary the requests will be routed to ResNet101.
The tf-serving/virtualservice-focused-routing.yaml manifest defines this configuration:
The match field defines a matching pattern and the route that is used for the requests with the matching header.
- Reconfigure the virtual service:
Click Check my progress to verify the objective
- Send a few requests without the
user-groupheader:
Notice that all of the responses are coming from the ResNet50 model - the probability of the military uniform label is around 45%.
- Now, send a few requests with the
user-groupheader set tocanary:
All of the responses are now sent by the ResNet101 model - the probability of the military uniform label is around 94%.
This deployment configuration can be used for A/B testing as you can easily monitor the performance of the canary model on a specific user group.
Congratulations
In this lab, you learned how to set up canary model releases to test for early issues and measure new model release performance through A/B tests with users in a live production environment. You set up a GKE cluster with a high-performance model server, TF Serving, with Anthos Service Mesh for creating a service mesh to load balance requests and route traffic between models. You deployed ResNet50 as a simulated production model, ResNet101 as a new canary release, and then configured traffic splitting strategies between models based on weighted load balancing and on request headers. You can now utilize canary releases in your own model deployment workflows to help you operate reliable and continuously improving production machine learning services.
Finish your quest
This self-paced lab is part of the Advanced ML: ML Infrastructure quest. A quest is a series of related labs that form a learning path. Completing this quest earns you a badge to recognize your achievement. You can make your badge or badges public and link to them in your online resume or social media account. Enroll in this quest or any quest that contains this lab and get immediate completion credit. See the Google Cloud Skills Boost catalog to see all available quests.
Next steps / Learn more
This lab is a part of the DeepLearning.AI Machine Learning for Engineering (MLOps) specialization available on Coursera. Continue your learning by enrolling in and completing the specialization to earn a certificate to showcase your MLOps expertise.
Google Cloud also offers a managed model prediction service through its Vertex AI platform. The Vertex Prediction makes it easy to deploy models into production, for online serving via HTTP or batch prediction for bulk scoring. You can deploy custom models built on any framework (e.g. TensorFlow, PyTorch, Scikit-learn, XGBoost) to Vertex Prediction, with built-in explainability, metadata, and monitoring tooling to track your models’ performance.
Learn more by visiting the Vertex Prediction documentation. Lastly, review Google Cloud's recommended best practices for model deployment and serving in this architecture guide.
Google Cloud training and certification
...helps you make the most of Google Cloud technologies. Our classes include technical skills and best practices to help you get up to speed quickly and continue your learning journey. We offer fundamental to advanced level training, with on-demand, live, and virtual options to suit your busy schedule. Certifications help you validate and prove your skill and expertise in Google Cloud technologies.
Manual Last Updated December 04, 2023
Lab Last Tested December 04, 2023
Copyright 2024 Google LLC All rights reserved. Google and the Google logo are trademarks of Google LLC. All other company and product names may be trademarks of the respective companies with which they are associated.