Checkpoints
Enable required APIs
/ 10
Create the Bigtable Instance
/ 20
Create the table and column family
/ 20
Create Dataflow Job to Import data
/ 20
Delete the Bigtable Instance
/ 10
Introduction to Cloud Bigtable (Java)
GSP1038

Overview
Cloud Bigtable is Google's fully managed NoSQL Big Data database service. It's the same database that powers many core Google services, including Search, Analytics, Maps, and Gmail.
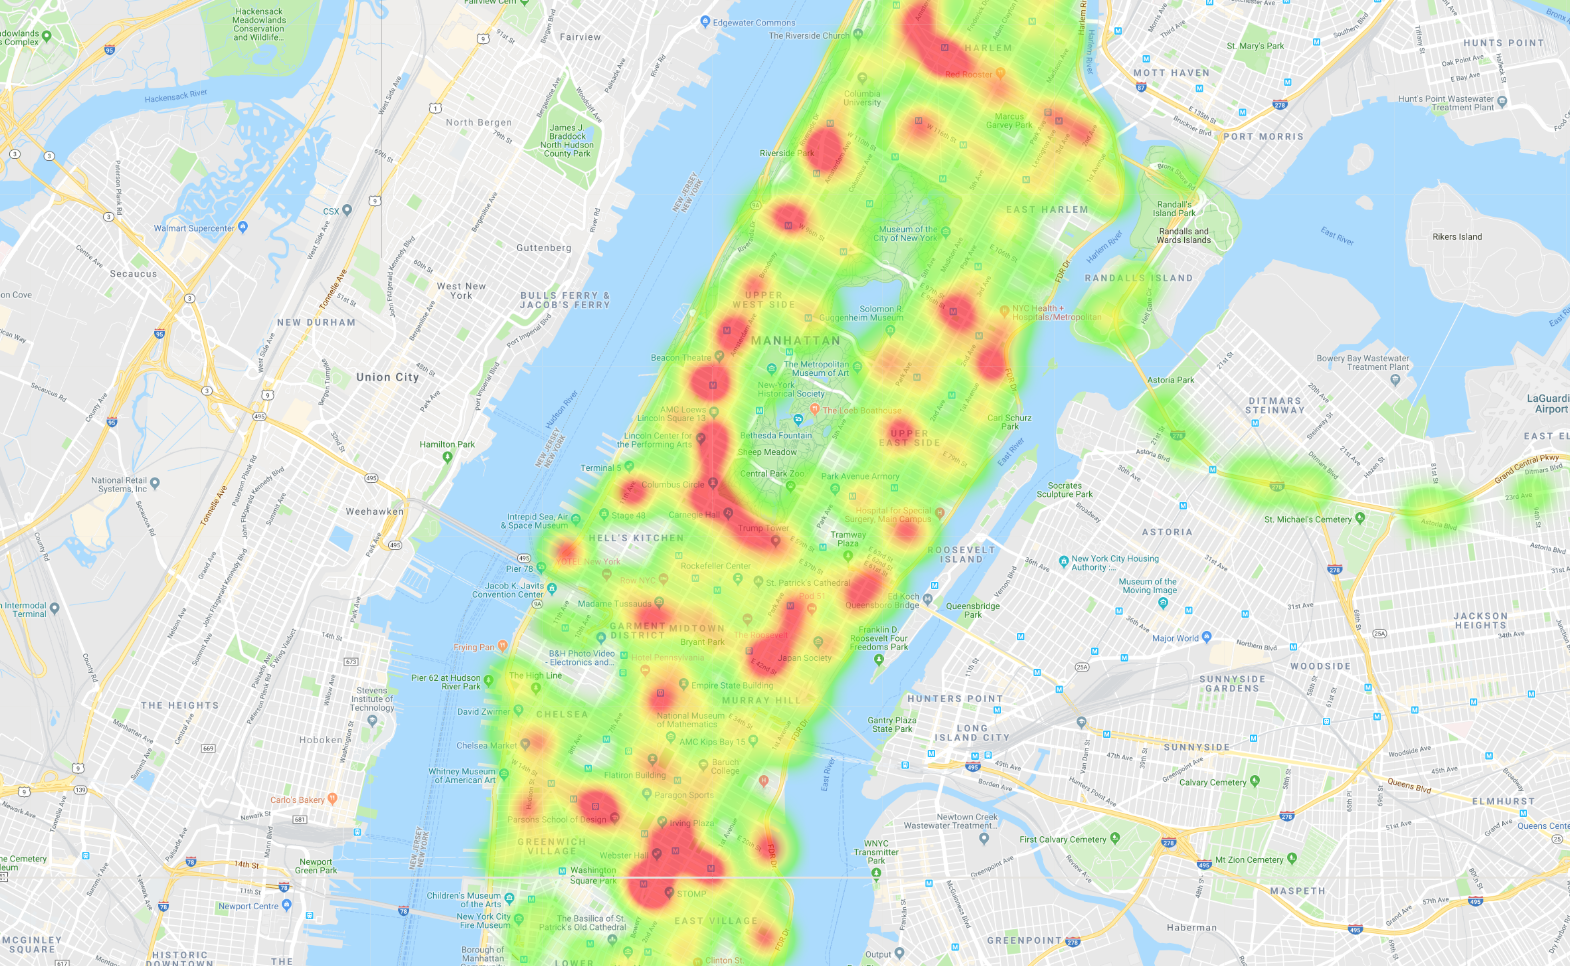
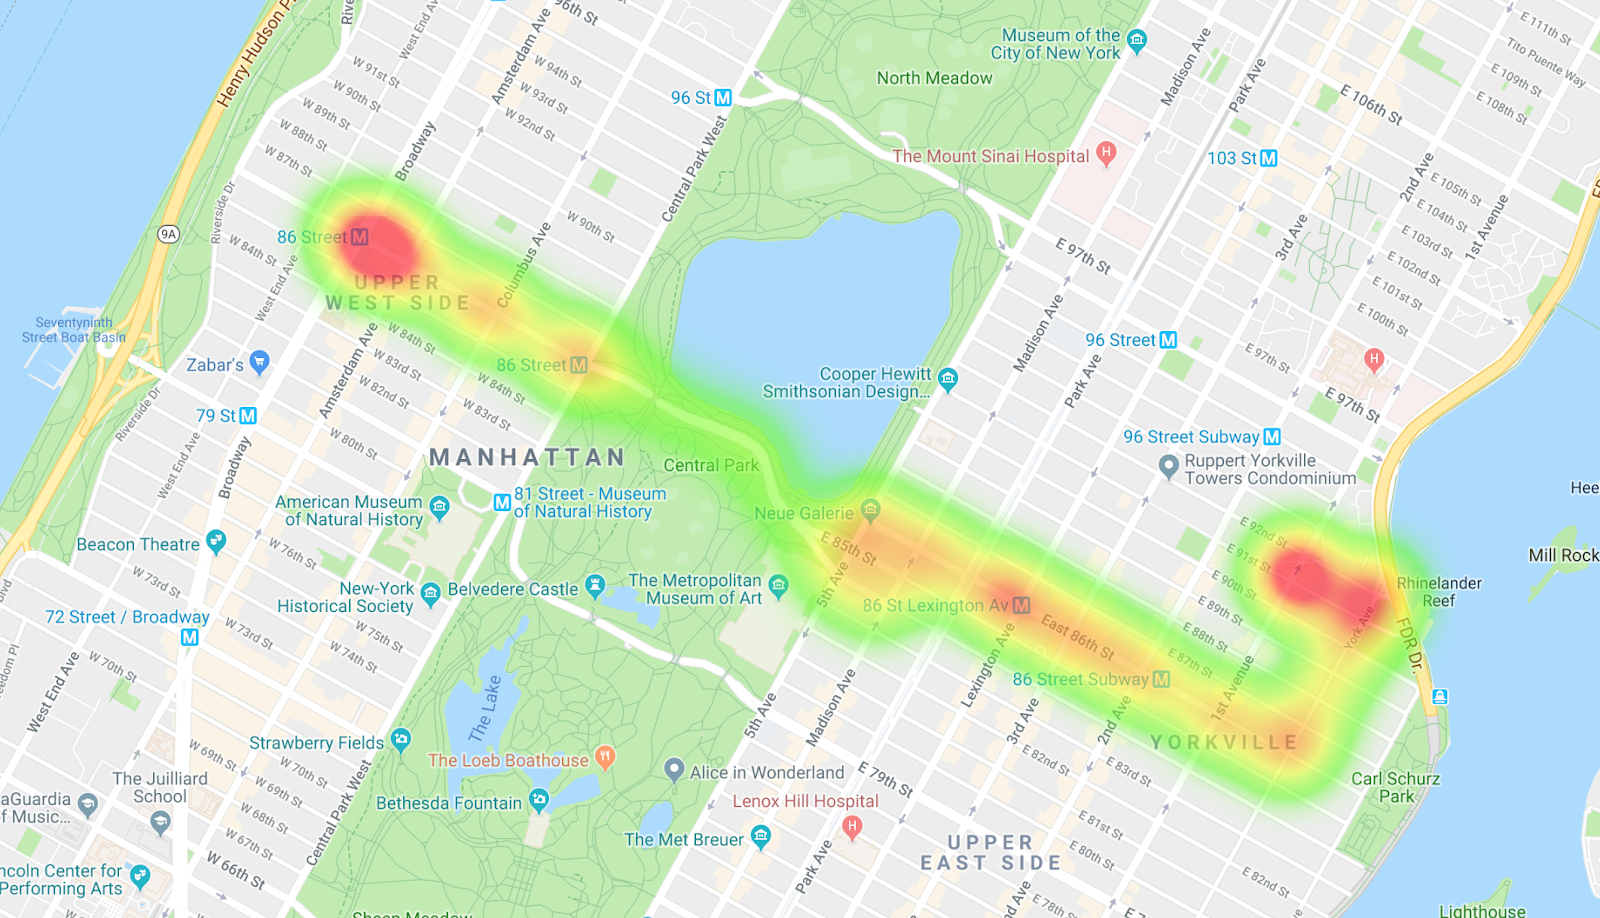
In this lab, you'll learn how to use Cloud Bigtable with the Java HBase client to query a dataset of geospatial timeseries data from the New York City bus system. For example, you'll query data that could create this heatmap of bus trips in Manhattan:
You'll learn how to
- Avoid common mistakes with schema design
- Import data in a sequence file
- Query your data
Setup and requirements
Before you click the Start Lab button
Read these instructions. Labs are timed and you cannot pause them. The timer, which starts when you click Start Lab, shows how long Google Cloud resources will be made available to you.
This hands-on lab lets you do the lab activities yourself in a real cloud environment, not in a simulation or demo environment. It does so by giving you new, temporary credentials that you use to sign in and access Google Cloud for the duration of the lab.
To complete this lab, you need:
- Access to a standard internet browser (Chrome browser recommended).
- Time to complete the lab---remember, once you start, you cannot pause a lab.
How to start your lab and sign in to the Google Cloud console
-
Click the Start Lab button. If you need to pay for the lab, a pop-up opens for you to select your payment method. On the left is the Lab Details panel with the following:
- The Open Google Cloud console button
- Time remaining
- The temporary credentials that you must use for this lab
- Other information, if needed, to step through this lab
-
Click Open Google Cloud console (or right-click and select Open Link in Incognito Window if you are running the Chrome browser).
The lab spins up resources, and then opens another tab that shows the Sign in page.
Tip: Arrange the tabs in separate windows, side-by-side.
Note: If you see the Choose an account dialog, click Use Another Account. -
If necessary, copy the Username below and paste it into the Sign in dialog.
{{{user_0.username | "Username"}}} You can also find the Username in the Lab Details panel.
-
Click Next.
-
Copy the Password below and paste it into the Welcome dialog.
{{{user_0.password | "Password"}}} You can also find the Password in the Lab Details panel.
-
Click Next.
Important: You must use the credentials the lab provides you. Do not use your Google Cloud account credentials. Note: Using your own Google Cloud account for this lab may incur extra charges. -
Click through the subsequent pages:
- Accept the terms and conditions.
- Do not add recovery options or two-factor authentication (because this is a temporary account).
- Do not sign up for free trials.
After a few moments, the Google Cloud console opens in this tab.

About the dataset
You'll be using a New York City bus dataset. There are more than 300 bus routes and 5,800 vehicles following those routes. The dataset is a log that includes destination name, vehicle id, latitude, longitude, expected arrival time, and scheduled arrival time, and is made up of snapshots taken about every 10 minutes for June 2017.
Schema design
To get the best performance from Cloud Bigtable, you have to be thoughtful when you design your schema. Data in Cloud Bigtable is automatically sorted lexicographically, so if you design your schema well, querying for related data is very efficient. Cloud Bigtable allows for queries using point lookups by row key or row-range scans that return a contiguous set of rows. However, if your schema isn't well thought out, you might find yourself piecing together multiple row lookups, or worse, doing full table scans, which are extremely slow operations.
Plan out the queries
The data has a variety of information, but for this lab you will use the location and destination of the bus.
With that information, you could perform these queries:
- Get the location of a single bus over a given hour.
- Get a day's worth of data for a bus line or specific bus.
- Find all the buses in a rectangle on a map.
- Get the current locations of all the buses (if you were ingesting this data in real time).
This set of queries can't all be done together optimally. For example, if you are sorting by time, you can't do a scan based on a location without doing a full table scan. You need to prioritize based on the queries you most commonly run.
This lab will focus on optimizing and executing the following set of queries:
- Get the locations of a specific vehicle over an hour.
- Get the locations of an entire bus line over an hour.
- Get the locations of all buses in Manhattan in an hour.
- Get the most recent locations of all buses in Manhattan in an hour.
- Get the locations of an entire bus line over the month.
- Get the locations of an entire bus line with a certain destination over an hour.
Design the row key
Though you are working with a static dataset, you will design a schema for scalability. This allows you to stream more bus data into the table and have it still perform well.
Here is the proposed schema for the row key:
[Bus company/Bus line/Timestamp rounded down to the hour/Vehicle ID]. Each row has an hour of data, and each cell holds multiple time-stamped versions of the data.
For this lab, use one column family to keep things simple. Here is an example view of what the data looks like. The data is sorted by row key.
| Row key | cf:VehicleLocation.Latitude | cf:VehicleLocation.Longitude | ... |
|---|---|---|---|
| MTA/M86-SBS/1496275200000/NYCT_5824 | 40.781212 @20:52:54.0040.776163 @20:43:19.0040.778714 @20:33:46.00 | -73.961942 @20:52:54.00-73.946949 @20:43:19.00-73.953731 @20:33:46.00 | ... |
| MTA/M86-SBS/1496275200000/NYCT_5840 | 40.780664 @20:13:51.0040.788416 @20:03:40.00 | -73.958357 @20:13:51.00 -73.976748 @20:03:40.00 | ... |
| MTA/M86-SBS/1496275200000/NYCT_5867 | 40.780281 @20:51:45.0040.779961 @20:43:15.0040.788416 @20:33:44.00 | -73.946890 @20:51:45.00-73.959465 @20:43:15.00-73.976748 @20:33:44.00 | ... |
| ... | ... | ... | ... |
Common mistake: You might think that making time the first value in the row key would be ideal, because you probably care about more recent data, and would want to run queries mainly around certain times. Doing this causes hotspots in the data, however, so compromise by putting time third. This makes some of your queries more difficult, but you need to do this in order to get the full performance Cloud Bigtable has to offer. Also, you probably don't need to get all buses for a certain time at once. Check out this talk by Twitter for information about how they optimized their schema.
Task 1. Create instance, table, and family
- Create a Cloud Bigtable table using Cloud Shell, which you can open by clicking the Activate Cloud Shell button in the upper righthand corner.
- Set the following environment variables to make copying and pasting the lab commands easier:
Cloud Shell comes with the tools that you'll use in this lab, the gcloud command-line tool, the cbt command-line interface, and Maven, already installed.
- Enable the Cloud Bigtable and Cloud Dataflow APIs by running this command:
Click Check my progress to verify the objective.
- Create an instance by running the following command:
Click Check my progress to verify the objective.
- After you create the instance, populate the
cbtconfiguration file, then create a table and column family by running the following commands:
Click Check my progress to verify the objective.
Task 2. Import data
Next, import a set of sequence files for this lab.
- Run the following commands to import the table:
If the import job fails, wait a minute and try again. Sometimes when enabling the APIs and creating the instances everything can take a minute to propagate.
Click Check my progress to verify the objective.
Monitor the import
You can monitor the job in the Cloud Dataflow UI. Also, you can view the load on your Cloud Bigtable instance with its monitoring UI. It should take 5 minutes for the entire import.
Task 3. Get the code
- Clone the Git repository containing a Java file which you will use to perform various queries on the dataset:
- Change to Java 11 by running the following commands:
Task 4. Perform a lookup
The first query to perform is a simple row lookup. You'll get the data for a bus on the M86-SBS line on June 1, 2017 from 12:00 am to 1:00 am. A vehicle with id NYCT_5824 is on the bus line then.
With that information, and knowing the schema design (Bus company/Bus line/Timestamp rounded down to the hour/Vehicle ID,) you can deduce that the row key is:
MTA/M86-SBS/1496275200000/NYCT_5824
BusQueries.java
The result should contain the most recent location of the bus within that hour. But you want to see all the locations, so set the maximum number of versions on the get request.
BusQueries.java
- In the Cloud Shell, run the following command to get a list of latitudes and longitudes for that bus over the hour:
Here is the result for this first query:
Task 5. Perform a scan
What if you want to see all the data for the bus line for that hour. The scan code looks pretty similar to the get code. Give the scanner a starting position and then indicate you only want rows for the M86-SBS bus line within the hour denoted by the timestamp 1496275200000.
BusQueries.java
- Run the following command to get the results:
An interesting modification to this query is to view the entire month of data for the M86-SBS bus line, and this is very easy to do. Remove the timestamp from the start row and prefix filter to get the result.
BusQueries.java
- Run the following command to get the results. (There will be a long list of results.)
Task 6. Introduce filters
Next, filter on buses heading east, buses heading west, and create a separate heatmap for each.
BusQueries.java
- Run the following command to get the results for buses going east:
- To get the buses going west, change the string in the valueFilter:
BusQueries.java
- Run the following command to get the results for buses going west:
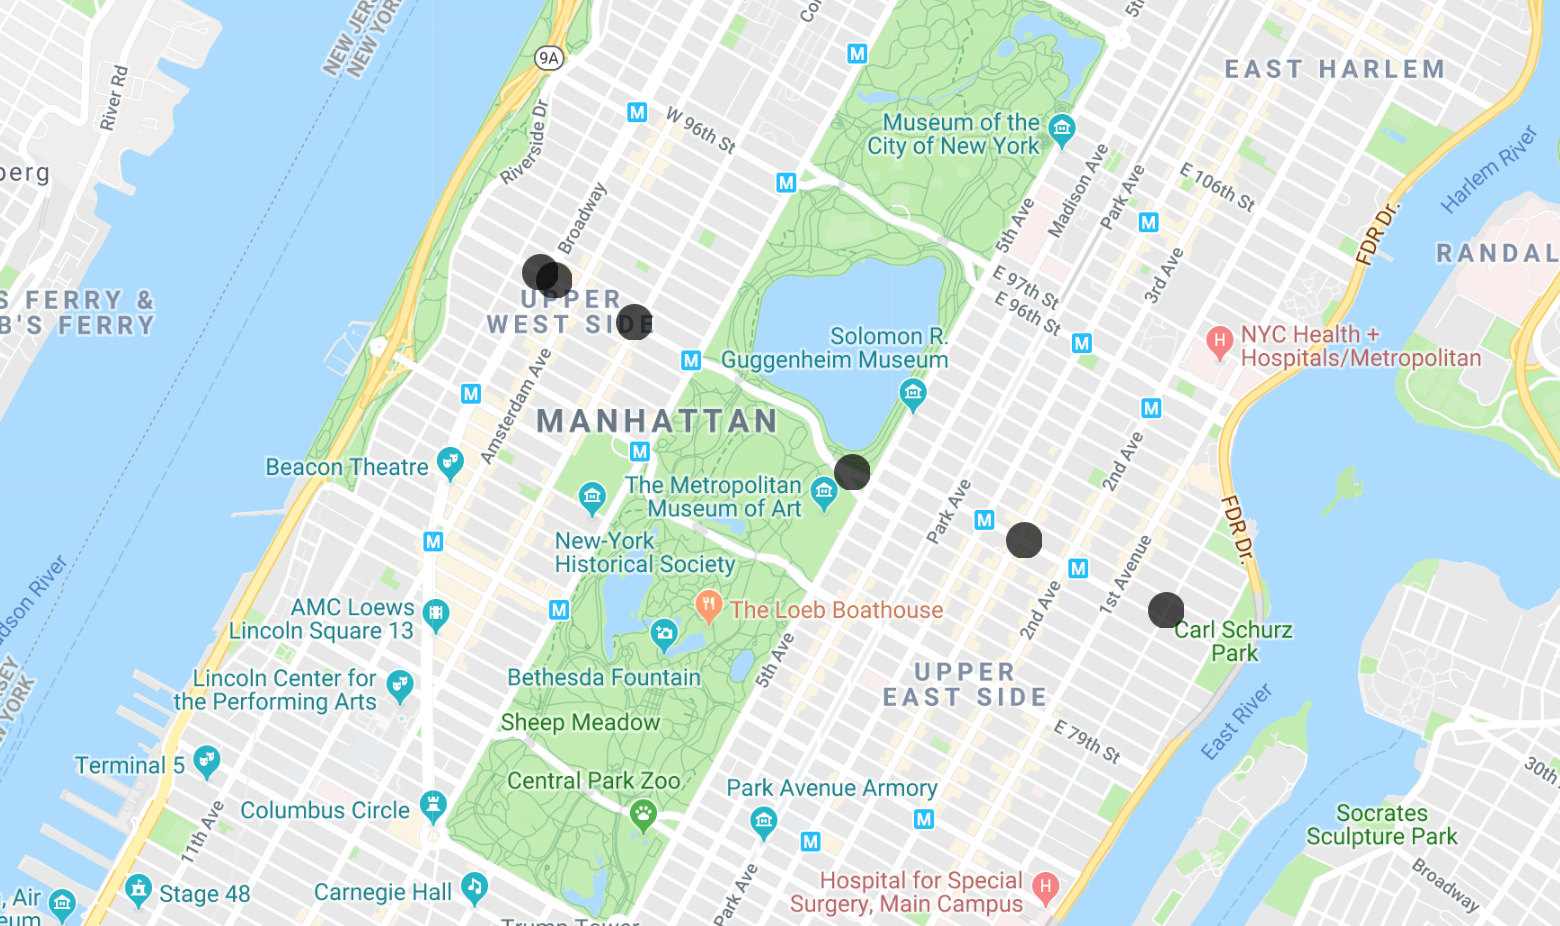
Buses heading east

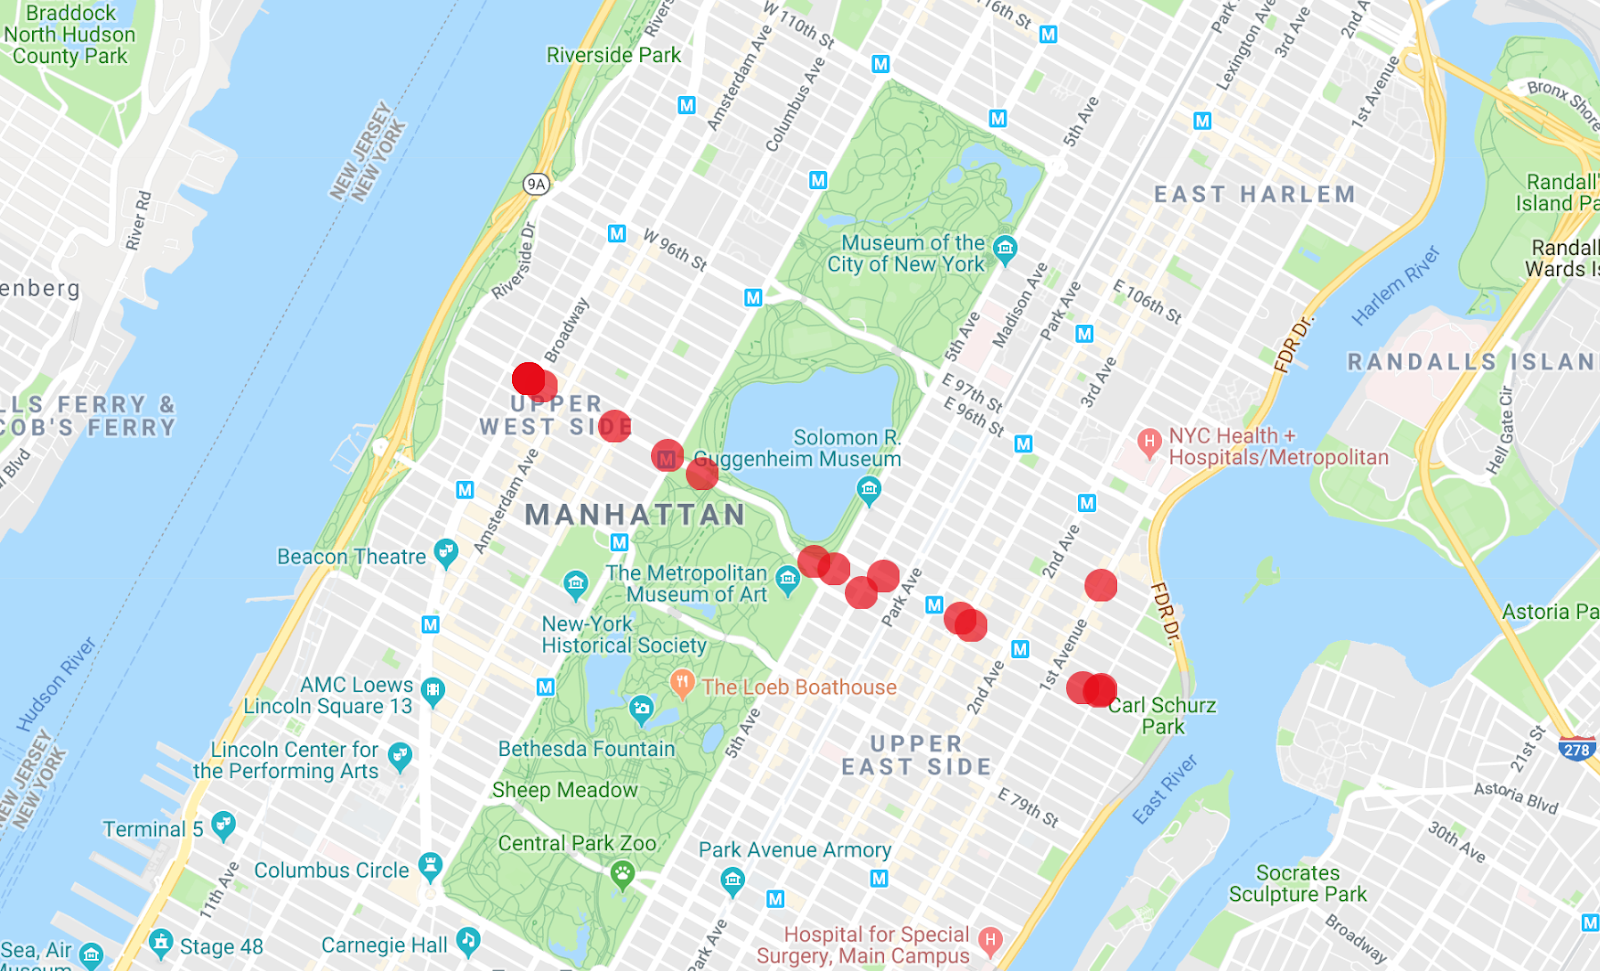
Buses heading west
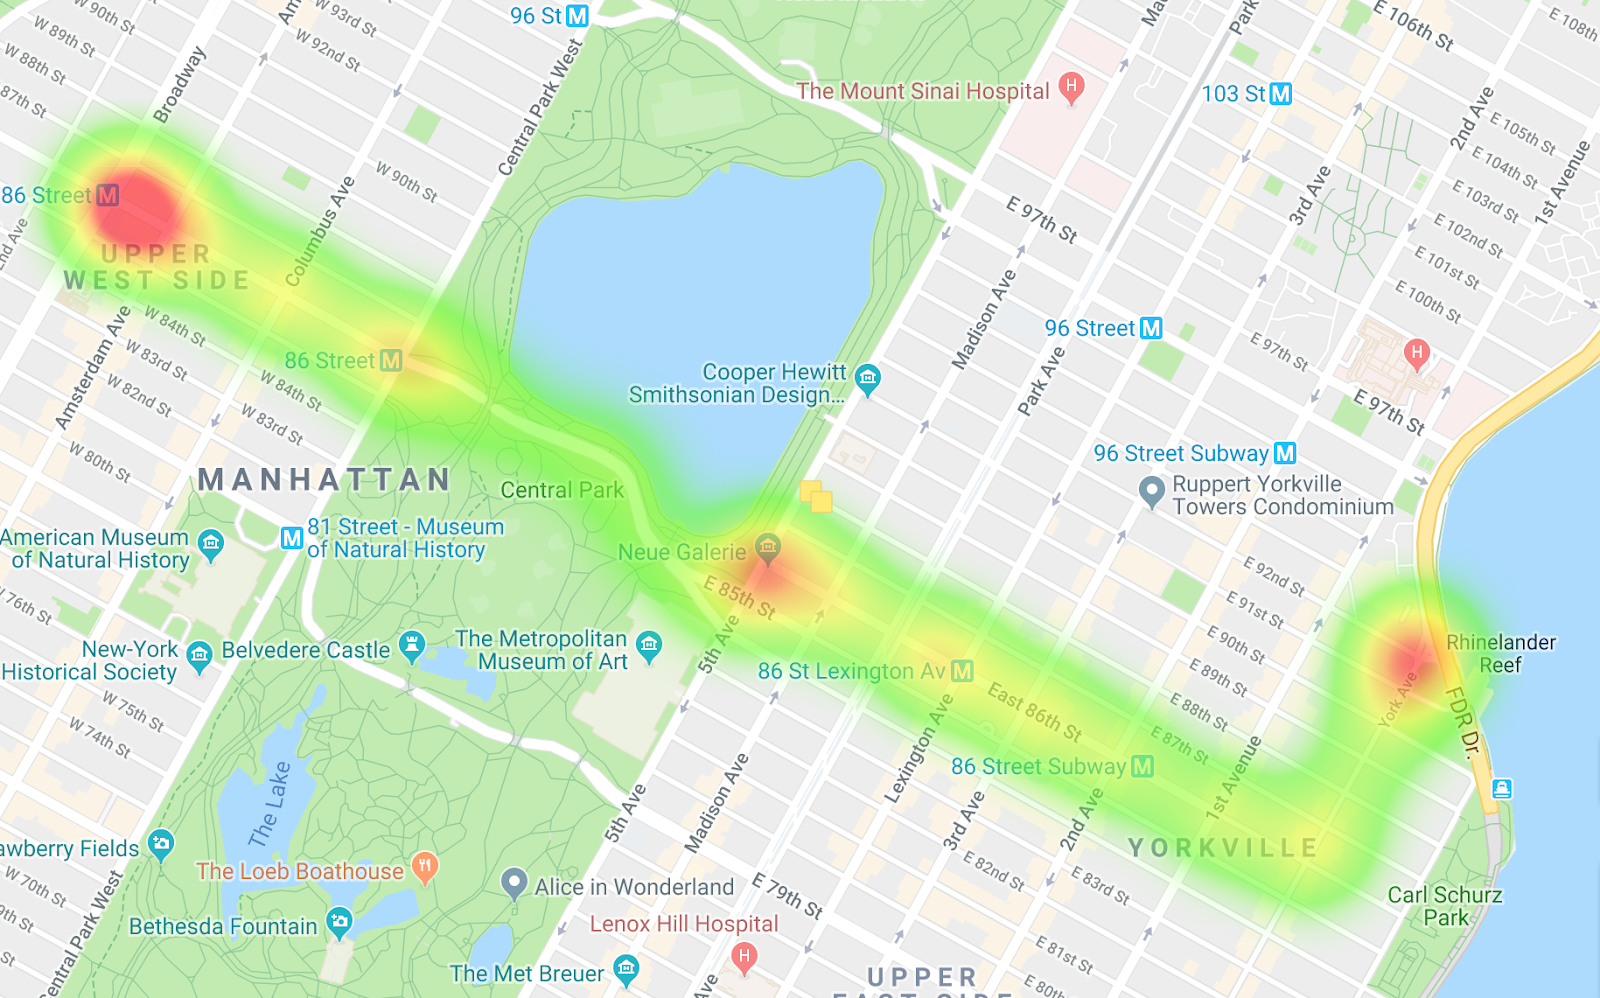
By comparing the two heatmaps, you can see the differences in the routes as well as notice differences in the pacing. One interpretation of the data is that on the route heading west, the buses are getting stopped more, especially when entering Central Park. And on the buses heading east, you don't really see many choke points.
Task 7. Perform a multi-range scan
For the final query, you'll address the case when you care about many bus lines in an area.
BusQueries.java
- Run the following command to get the results:
Task 8. Clean up to avoid charges
Because you are working in a lab, when you end the lab all your resources and your project will be cleaned up and discarded for you. You should know how to clean up resources yourself to save on cost and to be a good cloud citizen.
Click Check my progress to verify the objective.
Conclusion
You are now familiar with Cloud Bigtable and understand schema design; setting up an instance, table, and family; importing sequence files with dataflow; querying with a lookup, a scan, a scan with a filter, and a multi-range scan in Cloud Bigtable.
Next steps
- Learn more about Cloud Bigtable in the documentation.
- Try out other Google Cloud Platform features for yourself. Have a look at our tutorials.
- Learn how to monitor time-series data with the OpenTSDB integration.
- Read more about configuring your filter.
Google Cloud training and certification
...helps you make the most of Google Cloud technologies. Our classes include technical skills and best practices to help you get up to speed quickly and continue your learning journey. We offer fundamental to advanced level training, with on-demand, live, and virtual options to suit your busy schedule. Certifications help you validate and prove your skill and expertise in Google Cloud technologies.
Manual Last Updated October 25, 2023
Lab Last Tested October 25, 2023
Copyright 2024 Google LLC All rights reserved. Google and the Google logo are trademarks of Google LLC. All other company and product names may be trademarks of the respective companies with which they are associated.